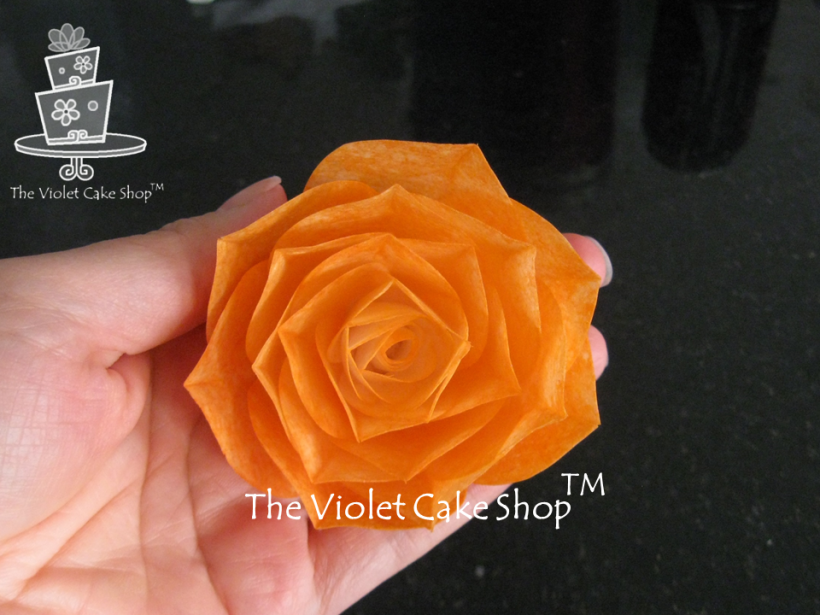
(this was coloured after the flower was made, using thinner brushes for the inside petals)
(Note: these are my own techniques developed independently with my own ideas and shared for personal use ONLY. They are not to be used for monetary gain or to develop products, books, DVDs, downloads or lessons for sale or to be taught in classes or tutorials, whether hands-on, on-line, in video format or in print without express written consent.)
I did it, yep! I jumped on the wafer paper bandwagon and I am loving it! Wafer paper is so versatile and gives a special delicate look to whatever decorative element you’re making. That’s why it’s so effective for creating flower adornments because it has an airy effect to it which is reminiscent of one of the natural qualities of a flower. However, with flowers comes the need for a bit of colour!
Now I’ve seen other posts that lament about how hard it is to achieve any type of decent colour on wafer paper, or how it requires special tools and equipment like an edible printer, airbrush or special candy colours specially made for chocolate/candy melts. Others have settled for just using a good dose of petal dusts to try and colour wafer which mostly just leaves a VERY patchy appearance, especially when viewed up close. Often, it requires A LOT of petal dust to achieve any sort of decent depth of colour at all but alas there is still the patchy or spotty appearance, which is ok from far away but up close…fuggedaboudit! Using tons of petal dust can become quite EXPENSIVE too! All of this is frustrating to say the least especially considering how beautiful and delicate wafer paper adornments can be. Straight petal dust on wafer was the first method I tried too, like many others and I was really not satisfied with the results. Not only was it patchy, but the colours were also muted, not very vibrant at all.
Straight Petal Dust – several coats:
So I set about trying to find an inexpensive way to colour wafer paper, that did not require any special equipment or colours, that could achieve a look that was not patchy, and would be a lot more VIBRANT…a method using colours that most people would already have. I knew I could not steam my dusted wafer paper flower because that would just warp the paper or worse, dissolve it to nothingness lol. So I experimented with any other method I could think of…I’d already tried using a single coat of straight dust, then several (and I mean SEVERAL) coats of straight dust, then dust with alcohol, dust with a touch of water, I even tried dust with shortening…
Then I tried straight gel colour, gel with alcohol, gel with a touch of water…I even tried straight airbrush colours…none achieved the look I wanted. Problem with gel colours is that they are concentrated. So if you wanted a nice colour on wafer paper using a gel colour that did not have much water content (to avoid warping the paper), you got overly dark or goopy looking results…not very appealing. You would need to dilute it to get a nice even shade or tone but the normal ways to dilute most colours just don’t work on wafer paper. Gel colours with even just a touch of water (although vibrant and even results, colour-wise) still warped the wafer paper enough to change its pure delicate quality. Other times, depending on the colour, you might get a streaky covering.
I found though that some gel colours worked better than others. Some, with two coats looked good but you needed to use a heavy hand and LOTS of gel colour in order to MAYBE achieve an even cover on wafer paper. But that would not be a very cost effective method because it would require A LOT of it to say colour a whole sheet. Some gel colours depending on the brand and colour, actually contained enough water to still end up warping the paper even if you did not dilute it, so it still was not ideal. Alcohol mixed with either, although effective when working on fondant because of the speed at which it dries, proved completely disastrous when used on wafer paper!
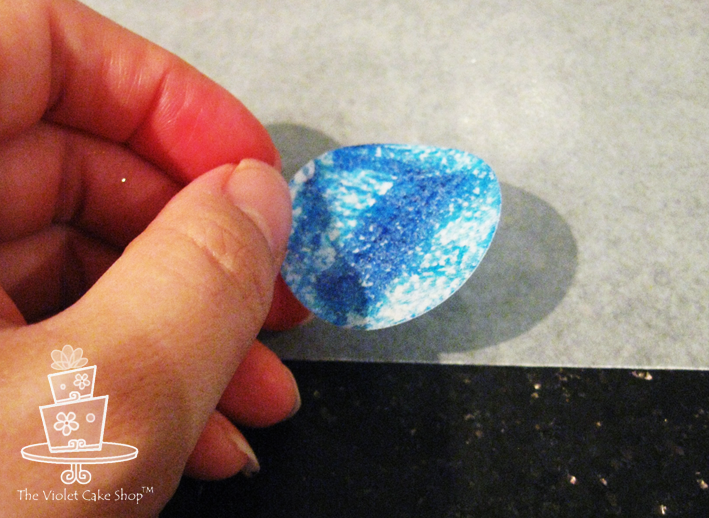
Here is an example where a straight gel colour had too much water content, that it warped the paper even when undiluted (AmeriColor Sky Blue):
~~
Seriously, I tried almost everything my mind could think of…methods that would normally work on fondant or gumpaste…but none of them got the effect I wanted on wafer paper, which was an even, deep or rich colour. I almost relented and considered buying special candy colours but then that would be ANOTHER set of colours which was getting costly…already had gel colours, petal dusts and airbrush colours…couldn’t really justify getting another set at a good chunk of change JUST to use on wafer paper.
Then I had a eureka moment and thought…hmmm what is it that makes candy colours work with wafer paper? Well, it was because they were OIL BASED, and oil does not warp wafer paper nor dissolve it in the same way water does. Why is that? I don’t know the science behind it but like with regular paper, oil is less destructive than say water. If you get water on regular print paper, it will warp it straight away and with enough water, it will weaken it to the point it is easy to rip through. Oil on the other hand is not nearly as destructive. It does absorb into the paper, but it doesn’t break it down the same way. Well the same properties seem to apply to wafer paper. Wafer paper is made up primarily of potato starch and vegetable oil after all. Water is involved in the process of making wafer paper, but the mixture is dried to the point where there is zero water content in the final product, which is a similar process used in producing print paper.
So I decided to test out my theory that oil (in this case vegetable oil) mixed with petal dust, would create the perfect mixture with which to colour your wafer paper and voila…it worked! Luckily I tested it some more because it turns out, you need to use just the right amount of oil…too much and the colours can look very spotty and overly concentrated in certain areas, although still more vibrant than straight dusting…too little and it can become too thick and pasty depending on the dust you use, or end up wasting the dust. The good thing is, you can do more than one coat to increase the vibrancy of the colours if you wanted it deeper. I also tested gel colours with oil and it worked too but not as well as with dusts. I found that the mixture never really came together and would be too goopy with some gel colours whereas with others it worked quite well, so it was hit and miss. Also, some gel colours still had enough water content to warp the wafer paper….again hit and miss.
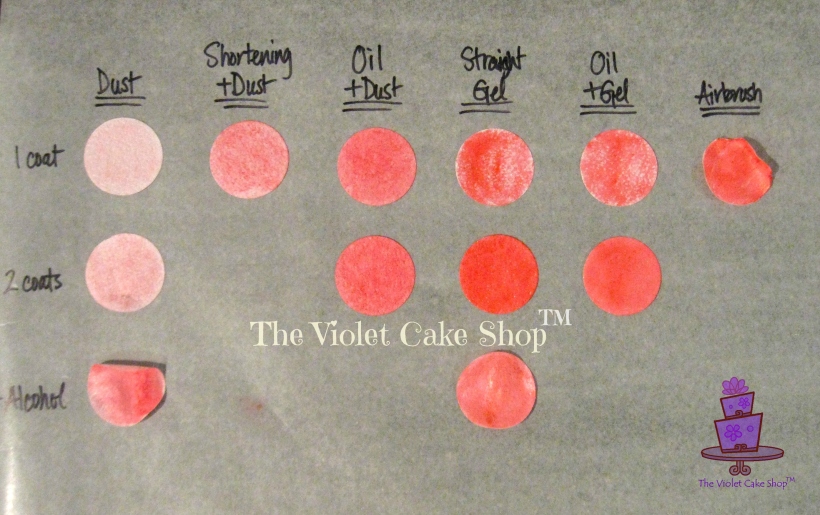
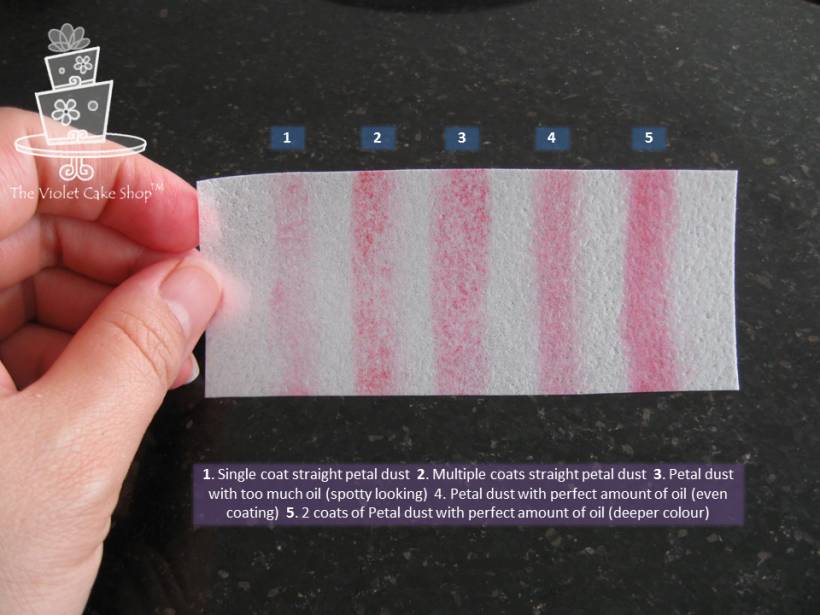
Here is a quick chart to show the results of some of the testing that was done (petal dust used – Elite Color Hot Pink; gel colour used – Wilton Rose; airbrush colour used – AmeriColor Deep Pink:
When using dust mixed with oil though, you do get a film on the surface of the wafer paper that, although not visible, does come off on your fingers when handling, and may affect the ability for you to adhere one piece to another. But if you let it rest overnight, the oil will dissipate enough that you are left with just the slightest amount of oil on the surface. Then you can still adhere wafer paper coloured this way, with just a bit of water as normal. I have not tried it with piping gel as the glue, but I would guess that it will also work once it has a chance to rest because the amount of oil on the surface becomes minimal.
When mixing your dust with vegetable oil, you will want to mix it to a paint-like consistency that is not too thick and not too oily appearing. It’s best to TEST our your dust/oil mixture on SCRAP PIECES of wafer paper to ensure it is the right consistency. If it is too oily, the colour will appear spotty. So add a bit more dust until you are happy with the results. A little goes a long way (unlike with gel colours or straight dusting). To apply the colour, you can paint with a standard brush. Or for larger surfaces like a whole sheet, you can use a large wide brush or a blotting method such as wadded up paper towels, a clean kitchen towel or disposable J Cloth.
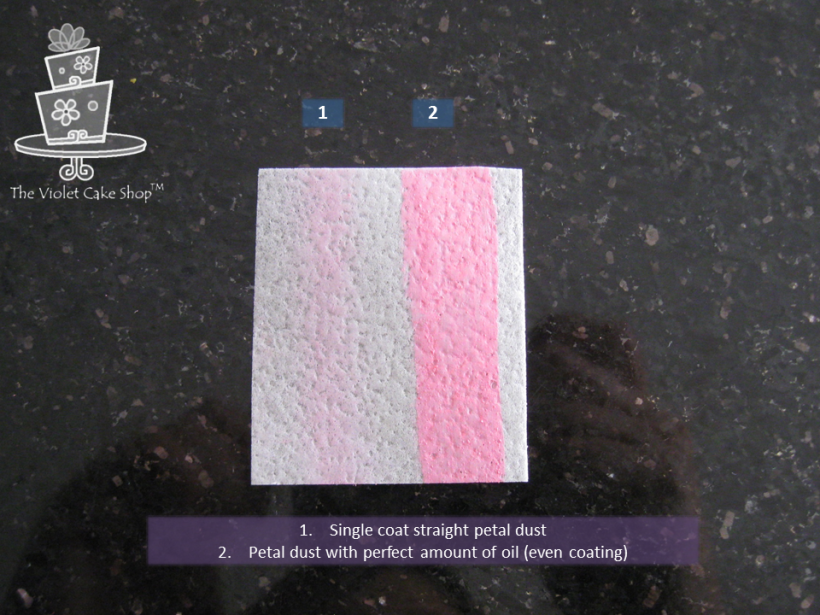
Side by Side comparison of different mix consistencies (petal dust used – Elite Color Hot Pink):
Other things I discovered when testing out this method were that the finer the dust and deeper the colour of the dust, the better the colour result. Lighter coloured dusts have some white pigmentation included in them so those colours tended to come out more pasty or matte looking. Also other forms of dust like sparkle dust which is coarser, tends not to colour wafer paper as effectively. You can get a nice shine but the colour is not very deep, nor even. Most lustre dusts on the other hand worked pretty well because the dust quality is much finer than say sparkle dust or disco dust.
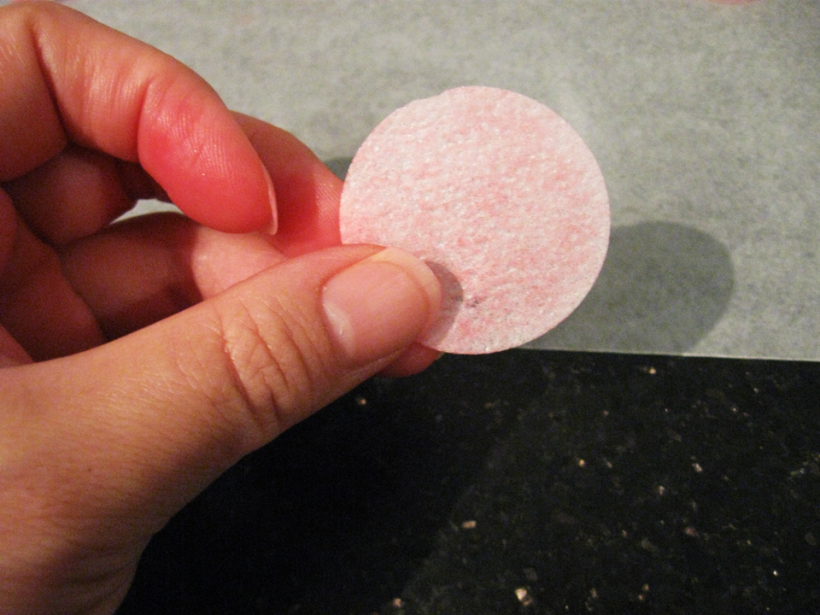
Example using lighter petal dust with white pigmentation which gives more of a matte finish (Elite Color Aurora Pink):
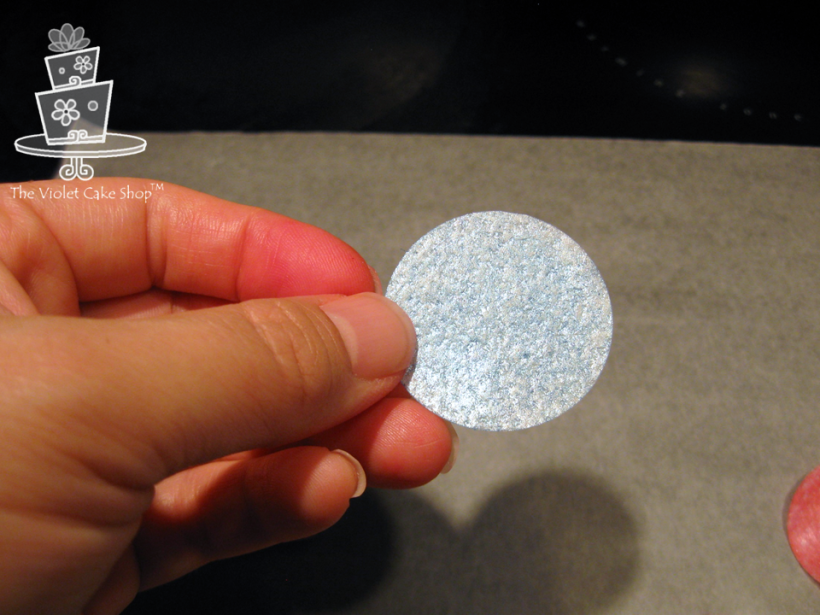
Example using lustre dust (Elite Color Blue Bell):
Another useful tip is to save your scrap pieces of wafer paper (you know, the pieces that are leftover after you cut out the shapes you are using), to use for testing out the consistency of your mixture. And it’s always a good idea to test the colour you are mixing to see that you like it before you mix more and attempt to colour whole sheets of wafer paper. It works even after you’ve assembled your flower. You just need to use a small brush that fits between the petals you are working on, so the tighter the petals, the thinner or smaller the brush you need to get down deeper.
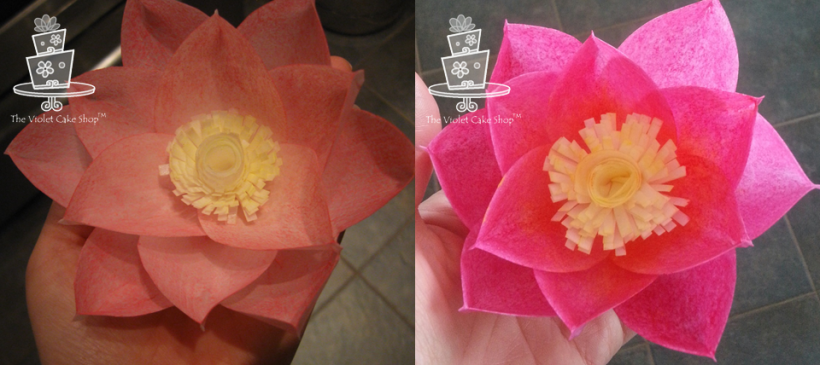
Side by Side Example of straight dusting (left) and same coloured dust mixed with vegetable oil (right)…(petal dust used – Elite Color Hot Pink)…OH and you’ll notice that the colours from the petal dust/oil mix are even more vibrant in natural light (see picture on the right):
DISCLAIMER (just in case lol) & VERY IMPORTANT INFO: I am NOT an expert in wafer paper, nor in all types of dusts or colours. I have done a lot of reading and played around a lot trying to find a way that works, but do not proclaim to know of all possible types nor methods for colouring wafer paper. This is just a tip I discovered that worked for me and hopefully works for others. Through trial and error, I’ve discovered that not all dusts behave the same so best to do a test piece or practice on a smaller surface before deciding to colour entire sheets or a naked flower you’ve worked an hour on. Some dusts work better than others and what I’ve found is, the finer the dust, the better the results.
I also discovered after more testing that it’s important to make sure there is not too much of the mix ON the brush when you make the first few strokes. It seems that if there is not already paint on the paper, there is no where else for it to go so if there is too much on the brush, it can concentrate it causing spottiness. Practice makes perfect and helps with knowing what is just the ‘right’ amount to use so test often until you are comfortable before painting completed pieces.
Happy Caking everyone =D
(Note: these are my own techniques developed independently with my own ideas and shared for personal use ONLY. They are not to be used for monetary gain or to develop products, books, DVDs, downloads or lessons for sale or to be taught in classes or tutorials, whether hands-on, on-line, in video format or in print without express written consent.)
If you’d like to recreate the stylized wafer paper rose from above, I have a tutorial in my SHOP on Facebook that gives step by steps and tips here: https://www.facebook.com/pages/The-Violet-Cake-Shop/95259702360?sk=app_251458316228

August 8, 2014 at 11:26 pm
Congratulations on your first blog entry Violet! Such great advice and tips! Thank you so much for doing such amazing research!
LikeLiked by 1 person
August 9, 2014 at 3:51 am
Congrats on the new blog Violet!! Look forward to seeing more of your post. Love this post. So so detailed. ❤
LikeLiked by 1 person
August 9, 2014 at 11:03 am
Great blog & tips Violet and lots of detail. I use coconut oil in small amounts mixed with gel colours. It worked pretty well. But the wafer paper I have isn’t thin like yours, so not sure how it would work on something so pouris.
LikeLike
August 9, 2014 at 11:22 am
Thank you so much for sharing this. I have only made one wafer paper flower and tried a few things in order to color it but never achieved what I was going for. Now I can’t wait to try another one. Thank you.
LikeLike
August 9, 2014 at 5:42 pm
This article was fantastic.. I haven’t tried the wafer paper yet, but I do own some! tiptoeing into this 🙂
LikeLike
Pingback: Colouring Tip for Wafer Paper | Cakes, Decor and More!
August 24, 2014 at 6:04 am
You are a cake angel …I believe the more knowledge we share the more inspired everyone is to try something new & this will keep our wonderful craft alive…thanks for sharing your knowledge you have inspired me….Dawn x
LikeLike
August 24, 2014 at 3:33 pm
Thank you for this Violet! I have only used petal dust for coloring wafer paper and now I can’t wait to try your method!
LikeLike
September 8, 2014 at 6:32 am
Congratulations, Violet! Amazing blog! Absolutely love your tip on colouring wafer paper this way! Thank you sharing with us! Can’t wait to see more of your great tutorials and tips!
LikeLike
October 4, 2014 at 9:49 am
Great tips Violet thank you I will certainly try this
LikeLike
October 13, 2014 at 9:42 pm
This is wonderful .. thank you so much for sharing ❤
LikeLike
October 25, 2014 at 9:26 am
Thank you . Its excellent
LikeLike
Pingback: Tips for Coloring Wafer Paper without an Edible Printer or Airbrush - Veena's Art of Cakes
April 24, 2015 at 10:18 pm
Thanks for your efforts which are really helpful. I have been cracking on how colour or to buy a colour wafer papers when I came across your write up.
I’m gonna try your method now.
Many thanks.
LikeLike
April 14, 2016 at 7:35 am
Really fantastic info, can’t wait to try this out for my daughters bday cake!
LikeLike
April 14, 2016 at 8:49 am
Awesome! Hope it’s helpful =D
LikeLike
October 11, 2018 at 7:59 pm
thanks for sharing
LikeLike
November 13, 2018 at 3:52 am
Glad you enjoyed it 😊
LikeLike
March 16, 2019 at 7:42 pm
This makes me so happy! I was trying to figure out how to use my wafer paper for mermaid scales for my own 50th birthday cake and this is definitely the method I will be using for coloring the paper. Thank you so much!
LikeLike
March 20, 2019 at 3:42 am
Glad you liked the post! Hope it makes colouring wafer paper stress-free 😁
LikeLike
Pingback: Tips for Coloring Wafer Paper without an Edible Printer or Airbrush - Veena Azmanov
Pingback: How To Colour Wafer Paper - Sugar Gardens