I know I have been SO neglectful lately with my blog…SO sorry folks. Boy, it’s tougher to find time to blog than I thought!! Well, I figured I really should at least post a little bit about my most recent cake since it involves me trying a completely new and foreign technique which is hand painting on a cake. And to make matters MORE interesting, I decided to try and paint with buttercream ON buttercream, as opposed to painting on fondant with traditional gel colours.

So, the back story is that it was my brother-in-law’s milestone birthday and my sis asked me for a cake. But knowing I was pretty busy already, she asked that I do something simple and it could be anything I wanted. It just had to have buttercream because her hubby is not a fan of fondant. So immediately I thought I would love to try some hand painting, but how to do it on buttercream? Surely I cannot do the fine detail work that others are so adept at…AND besides, I am a true painting novice and never really did get the hang of it during art classes (I was always good at sketching and using pencil crayons but never did catch on with painting and creating pictures using a brush) so anything too intricate was out of the question.
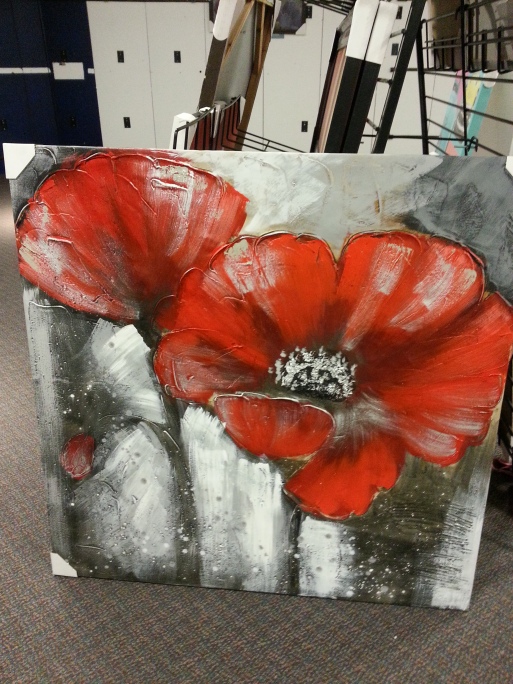
Well luckily for me, I saw a lovely oil painting of some poppies that was very abstract in nature but also had some really interesting texture going on with its heavily paint-laden strokes. It looked simple enough so that I was not too intimidated,
AND it happened to go well with another technique I’d been wanting to try which was to make a gumpaste poppy. So bingo, bango…it ‘popped’ into my head that I could combine the two ideas and do a poppy themed cake with the 2D poppy painting on the bottom, and a 3D gumpaste poppy up top.
(Note: these are my own techniques developed independently with my own ideas and shared for personal use ONLY. They are not to be used for monetary gain or to develop products, books, DVDs, downloads or lessons for sale or to be taught in classes or tutorials, whether hands-on, on-line, in video format or in print without express written consent.)
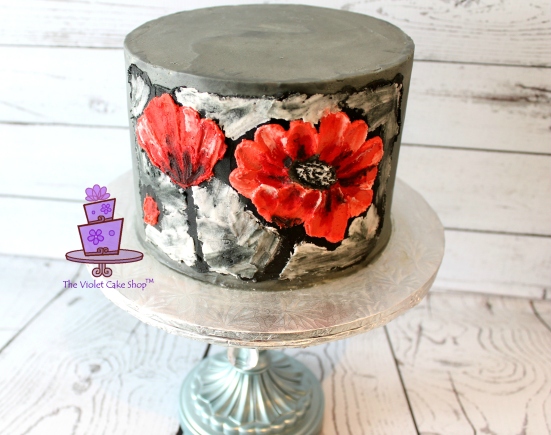
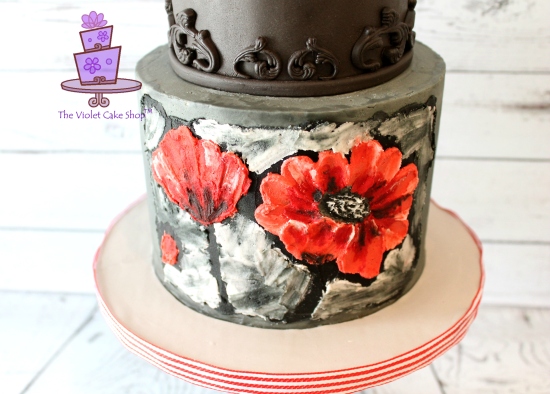
To achieve the textured look of the painting that inspired it, I decided to paint with buttercream. To do this, I just mixed my buttercream with different colours so that I had a light red, a darker red, light grey, medium grey, and a dark grey that was almost black. I also kept some white.
Then I iced the bottom tier in the medium grey, chilled it well for a few hours so it was hard enough that I could paint on it without smushing the finish. Next I worked on creating a canvas for it by ‘painting’ a rectangle using the dark grey (well, it was more like spackling since I used my large palette knife for this part). It did not need to be perfectly smooth since it was an abstract piece. This dark grey background would work to ‘frame’ the finished painted piece.
Then I started on the flowers by adding some petals with the light red using a few different tools to create the effect of paint strokes (a small palette knife, the back end of a spoon and a very wide paint brush that had fairly hard bristles – too soft and it would not have dragged the buttercream enough).
** And oops, I should mention at this point that unfortunately I did not take progress shots as I painted because I did not have much confidence it would work as I wanted and was worried about wasting time if I had to go another route lol. Next time I try something new, I will give myself more time and try to take progress shots **
So anyhoo…next, I popped it back in the fridge for about 20 mins before going on to add the next layer of colour…just so it could chill enough to paint on a different colour buttercream without blending in the colour I’d just laid down. After a bit of chillin’, I added some depth and detail with the darker red, then popped it back in the fridge before adding some white on the petals and black over the dark red. Then again it went back in the fridge before I added the white random brushstrokes surrounding the poppies, which really brought the painting to life.
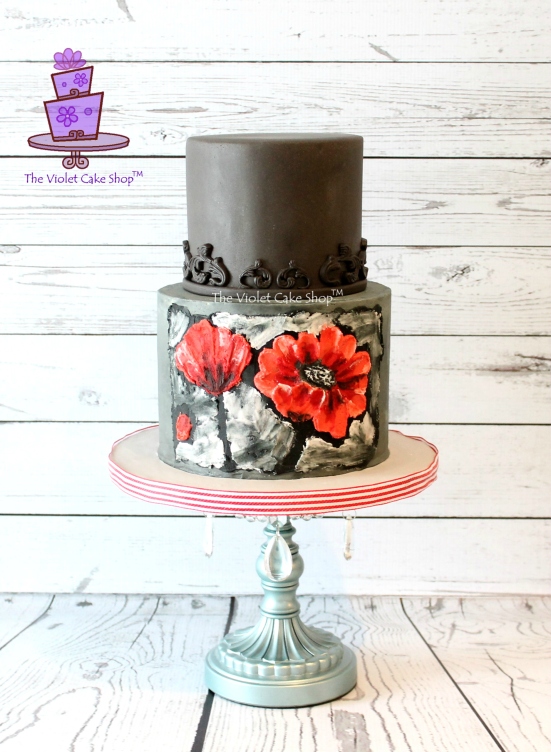
When imagining the cake in my head, I knew just a single tier with the painting would look incomplete, even if I topped it with a 3D gumpaste poppy. So I decided I would make it a two tier instead, despite the fact that we definitely did not need that much cake. Well, it just means more leftovers I guess hehe! So this is how it looks with the second tier on top, BEFORE I added the gumpaste poppy…
As you can see, it still needed something on top which is where the simple gumpaste poppy came into play. It was enough to complete the overall design and make for a lovely contrast against the 2D effect of the buttercream painted tier. The gumpaste poppy was made after watching James Roselle’s Spring & Summer Sugar Flowers class on Craftsy (link to class here). Mine is not nearly as gorgeous as his and I had lots of issues with it like not getting the veining mould or formers in time, to not having enough time for the petals to dry to really shape it the way I wanted, to having petals crack on me, to having petals slowly droop because they were too heavy for the wires I used…etc. etc!
Anyhoo…TADA…!! Here is the completed cake…probably my most popular design by far even though it is most definitely NOT my hardest nor time-consuming one. It WAS however still as stressful as some of my more complex designs because I tend to stress a lot before I actually attempt anything new! Well if I didn’t stress, it would mean I didn’t care….right?
Hope you are able to learn a bit from my trials and tribulations and have had a bit of fun finding out a bit of what goes on in my head when I come up with a design…haha!
Violet =D
(Note: these are my own techniques developed independently with my own ideas and shared for personal use ONLY. They are not to be used for monetary gain or to develop products, books, DVDs, downloads or lessons for sale or to be taught in classes or tutorials, whether hands-on, on-line, in video format or in print without express written consent.)


February 6, 2015 at 9:57 pm
I really love your work!!
LikeLike
February 7, 2015 at 3:05 am
Beautiful Painting Violet ❤
LikeLike
February 7, 2015 at 8:53 am
You know I LOVE ❤️ ❤️ your blog Miss Violet. Congrats on your Pretty Witty video tutorial launch!!! 💋
LikeLike
February 11, 2015 at 1:29 pm
Just Amazing! WOW
LikeLike
October 3, 2016 at 12:53 pm
Hi Violet. I just discovered your site and beautiful cakes. Two months ago I “retired” from the corporate world, to be a stay at home mom, for the first time ever (after 37 years of working). Through fate, I have found my way to become a cake artist too. I’m just learning – the same way you did, online tutorials and blogs, and haven’t been at it very long. Friends and family are the current recipients of my trial cakes.
Thanks for sharing with us all. And this cake is gorgeous! Wonderful job.
Marcia.
LikeLike
October 10, 2016 at 11:07 pm
Thank you so much…
Yes, sounds just like the path I went through…wish you continued success and love for what you do =)
LikeLike
June 6, 2017 at 9:03 am
2.5 yrs late but I really hope you see my comment!! This is so beautiful..Didn’t know one could paint on bc!!! Did you use the American buttercream 1:3 ratio..Or is it something else?
LikeLike
July 23, 2017 at 1:24 am
Hi Amy…just seeing your comment now. I use a version of American Buttercream that has 2 parts shortening to 1 part unsalted butter and 1 part salted butter (so total is 2 parts shortening and 2 parts butter). Not sure if the kind of buttercream makes a difference since I’m chilling it in between layers of paint so it really shouldn’t matter except if it’s all shortening which I suspect will not firm up the way part-butter buttercreams will. I’ve never tried it with other kinds of buttercream so cannot say for sure so I guess you can always experiment with a small batch first. HTH – Violet =D
LikeLike
May 22, 2018 at 5:07 pm
Love it. It looks great
LikeLike
May 23, 2018 at 5:58 am
Thanks so much! 😊
LikeLike