

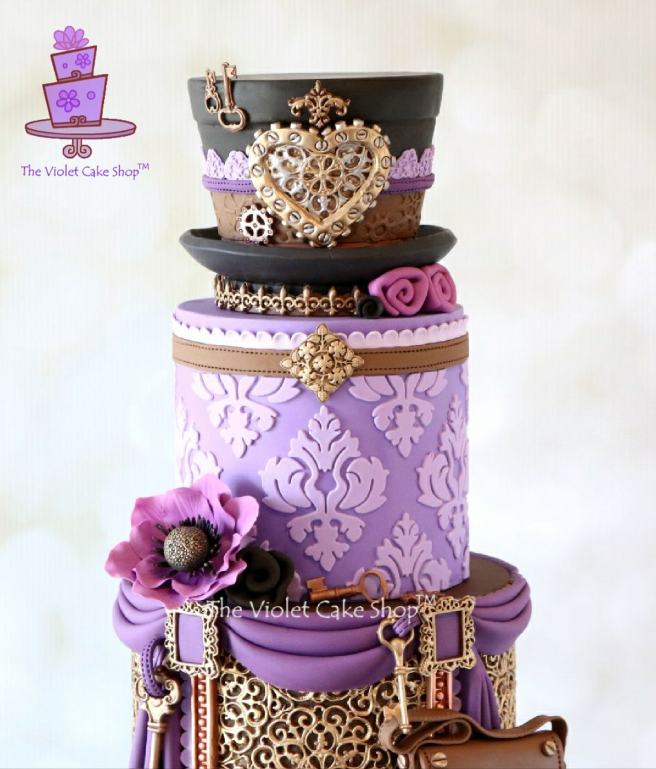
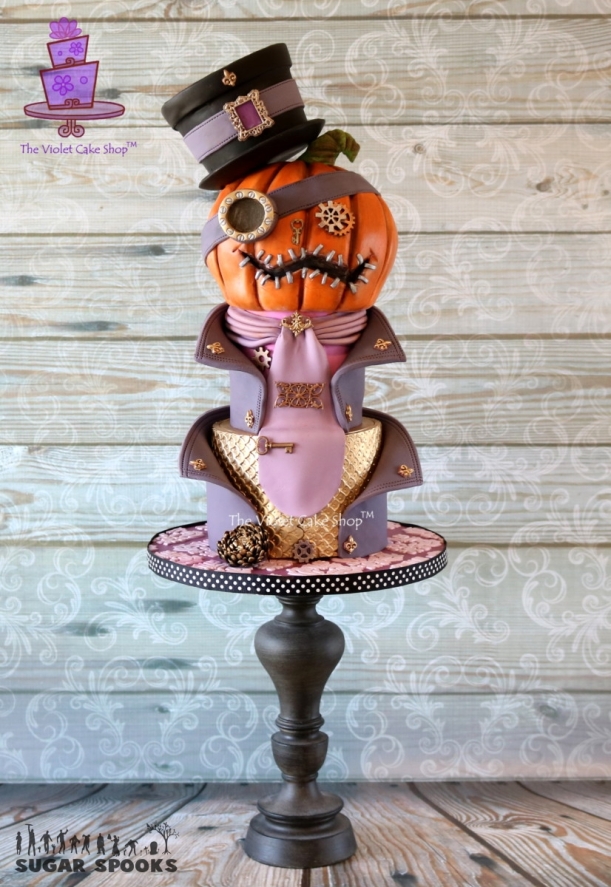
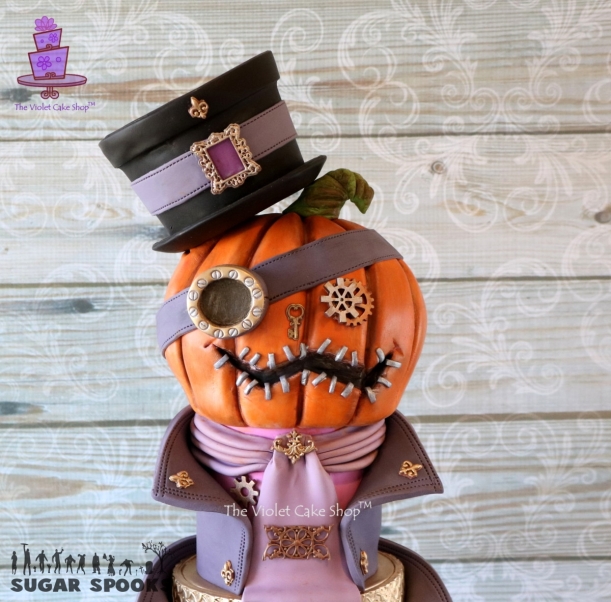
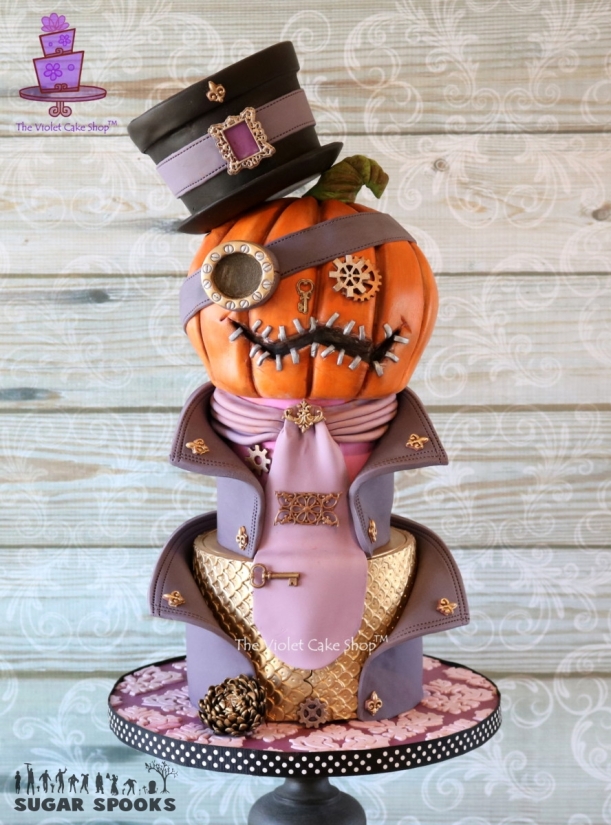
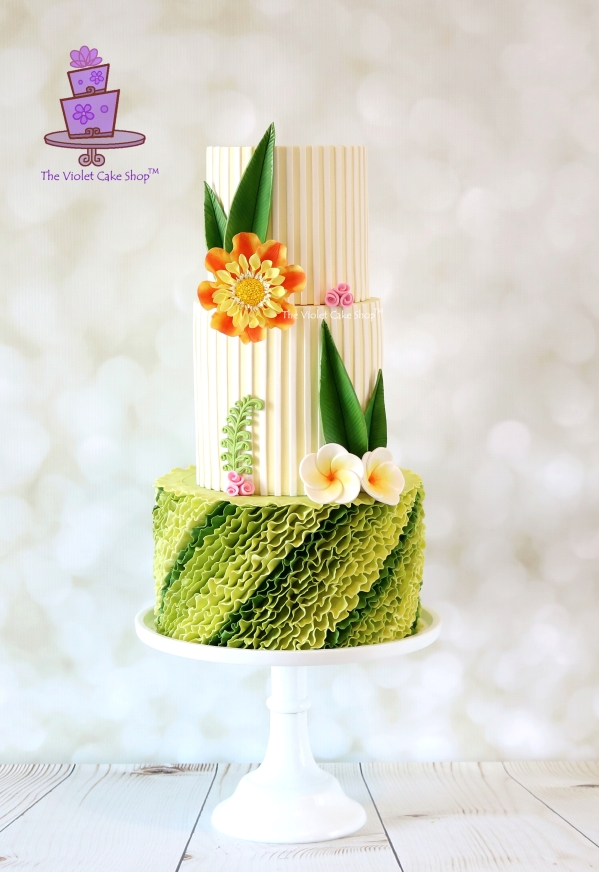
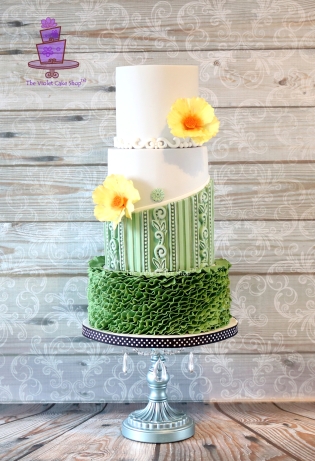
Recently, I created a tutorial for my Industrial Steampunk Chic cake (a cake designed originally for the Steam Cakes Collaboration) that appeared in the October issue of Cake Masters Magazine, UK.
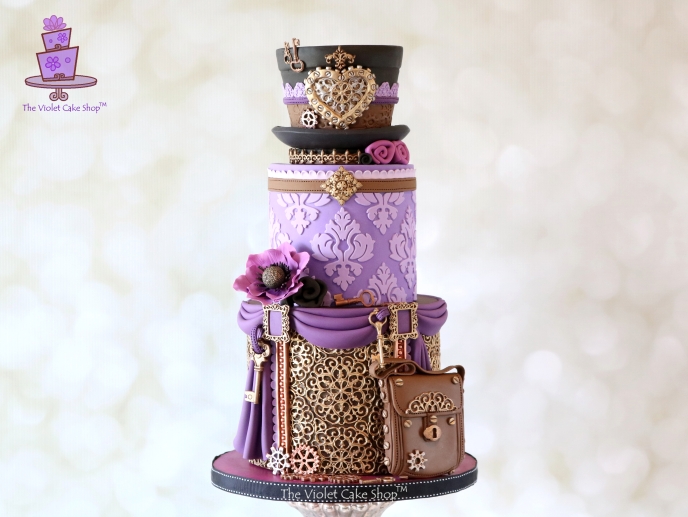
The original cake featured an orchid coloured anemone flower in the design, sitting between the two tiers, but the flower was not included in the print tutorial since it would have added at least 28 more steps to an already lengthy tutorial. This was communicated to my contact at Cake Masters and passed along to the editors when the tutorial was submitted.

Unfortunately, there was a miscommunication or misunderstanding somewhere along the line when the magazine went to print, so although the printed tutorial did not have those steps included, there was promotional material created and posted that indicated the flower was part of that tutorial in the print issue. Of course, a few people were a bit disappointed to find out it was not in the magazine.
As a happy solution, I created a free tutorial for the anemone flower that I posted on my Facebook page, to share with Cake Masters, their readers, and anyone else that was hoping it was part of the tutorial. I am also adding it permanently here to my blog so it will be easier to find later on for those looking! See below for the step-by-steps details and pics…but first…
GREAT NEWS: A few people sent me messages when the magazine first came out, asking if the full Steampunk Chic Cake tutorial would be available to download in PDF file format and I’m happy to say that it is finally now available for sale in my Facebook SHOP. It’s on for an introductory price of 50% OFF, for a limited time. So that’s just $11 CAD for over 135 high quality pics and 85 pages of step-by-step instructions, tips and best practices, which works out to less than $9 USD (reg. $22 CAD or $17 USD). It also includes a printable version of this Gumpaste Anemone tutorial as a BONUS.
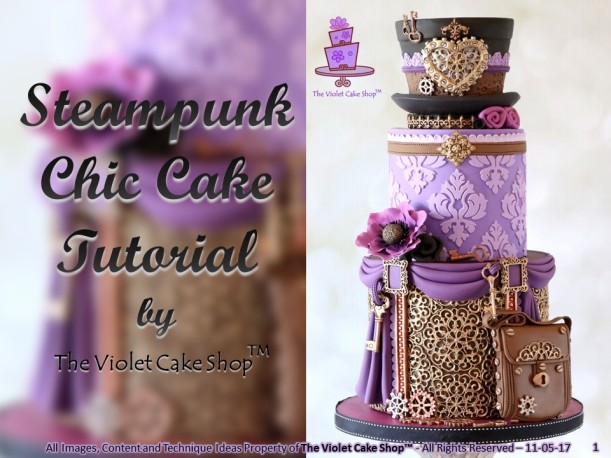
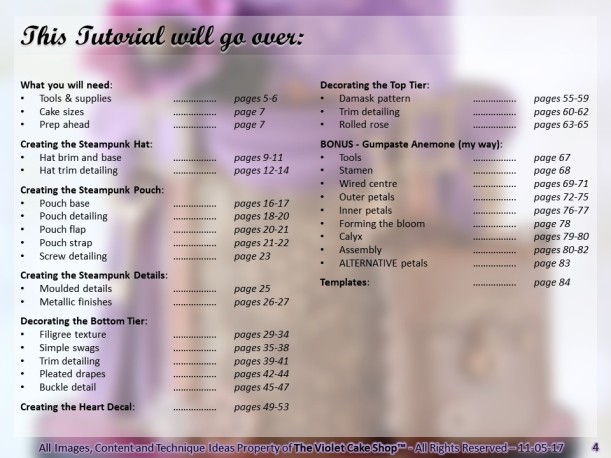
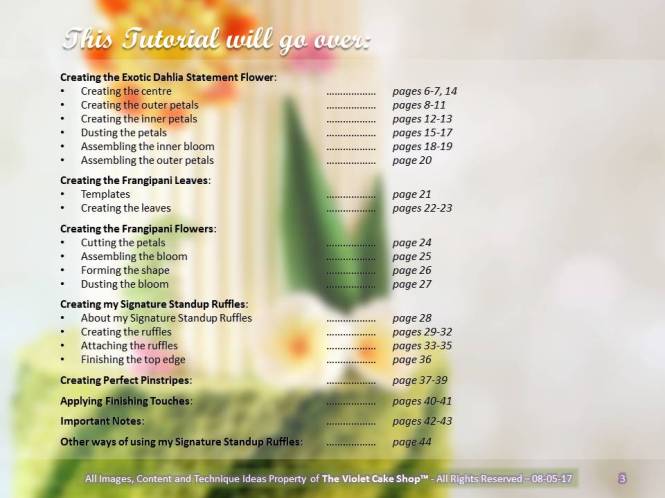
Here is what the tutorial covers…
I’m also putting ALL my other tutorials on SALE for 40% OFF in celebration of the release of this latest tutorial.
So now on to the good stuff, the free stuff…😉
The Violet Cake Shop™’s FREE GUMPASTE ANEMONE TUTORIAL:
(Note: these are my own techniques developed independently with my own ideas and shared for personal use ONLY. They are not to be used for monetary gain or to develop products, books, DVDs, downloads or lessons for sale or to be taught in classes or tutorials, whether hands-on, on-line, in video format or in print without express written consent.)
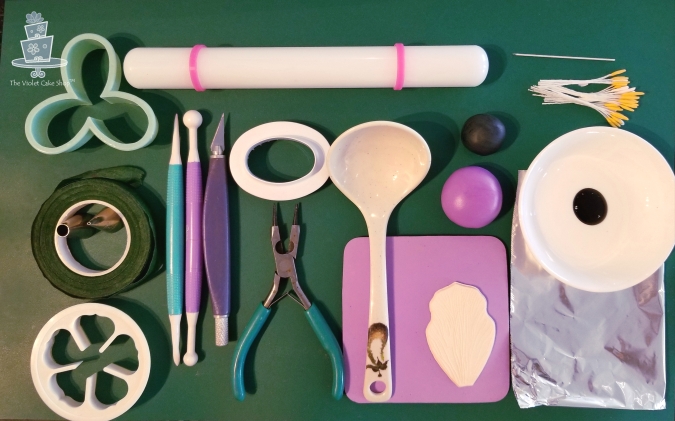
Tools and supplies you will need:
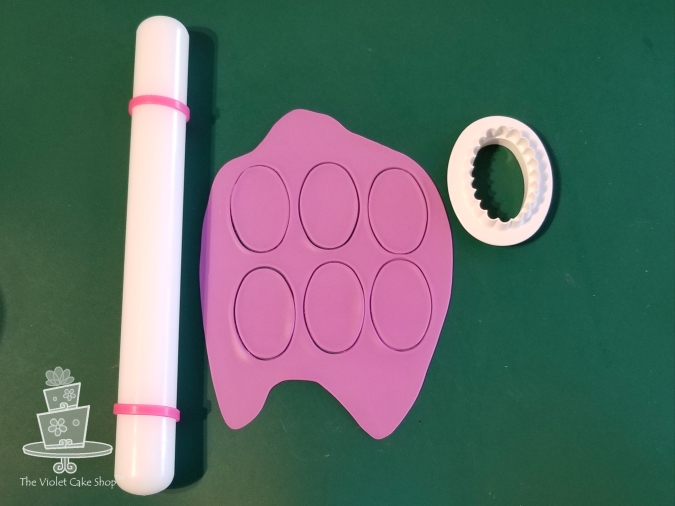
– 3 petal flower cutter (alternatively, you can use an oval cutter – pictured) – floral tape – #2 piping tip and #12 piping tip – 5 petal flower cutter – small silicone rolling pin – dresden tool – ball tool – craft or exacto knife – needle nose pliers/wire cutter – wide mouth Japanese soup spoon – 1 oz (large gumball size) gumpaste coloured black – 2 oz (golf ball size) gumpaste coloured orchid/magenta (2.5 parts deep pink to 1 part purple) – thin foam pad – flower veiner – 20 or 24 gauge floral wire cut to 3″ length – lily stamen (if cannot find long black stamen) – black gel colour for dyeing stamen – aluminum foil – paper towels (not pictured)
**All Images, Content and Technique Ideas Property of The Violet Cake Shop™ – All Rights Reserved – 10/25/17**
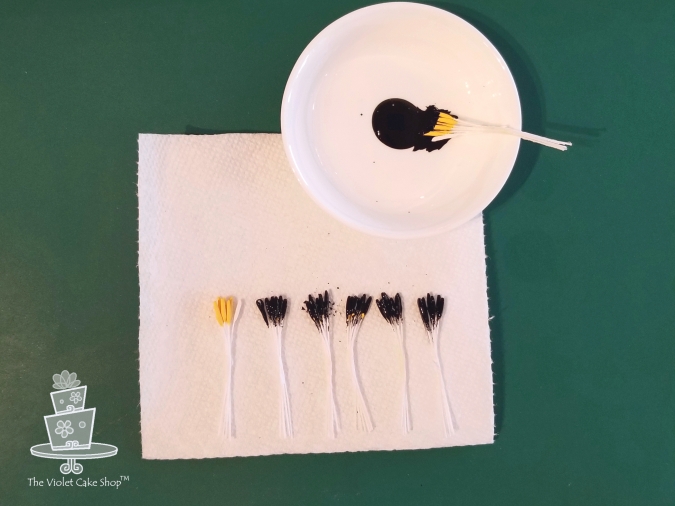
STEP 1 –
If you cannot find black stamen (which I could not find readily), you will have to dye stamen of similar size and length as those found on anemones, which I find lily stamen work well.
You can dilute the black gel colour with some vodka before dipping your stamen, or you can paint the colour on with a standard brush dipped in the colouring.… Let your stamen dry on some paper towel. Wipe off excess colour if necessary.
**All Images, Content and Technique Ideas Property of The Violet Cake Shop™ – All Rights Reserved – 10/25/17**
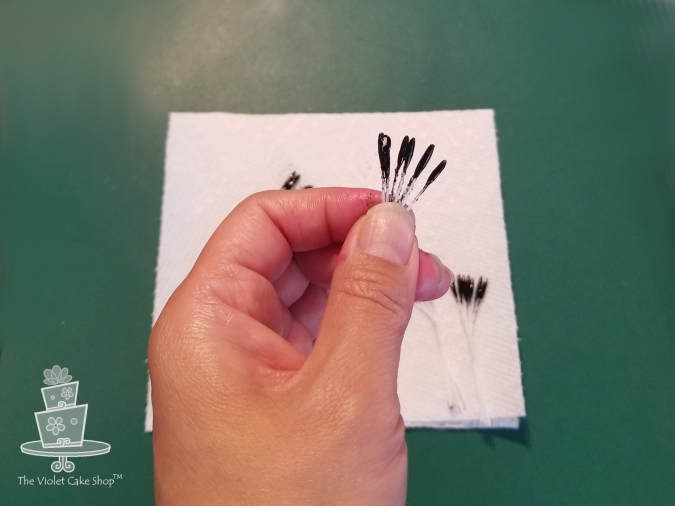
STEP 2 –
Spread out the stamen with your fingers, into a line, so they are not so bunched together.
**All Images, Content and Technique Ideas Property of The Violet Cake Shop™ – All Rights Reserved – 10/25/17**
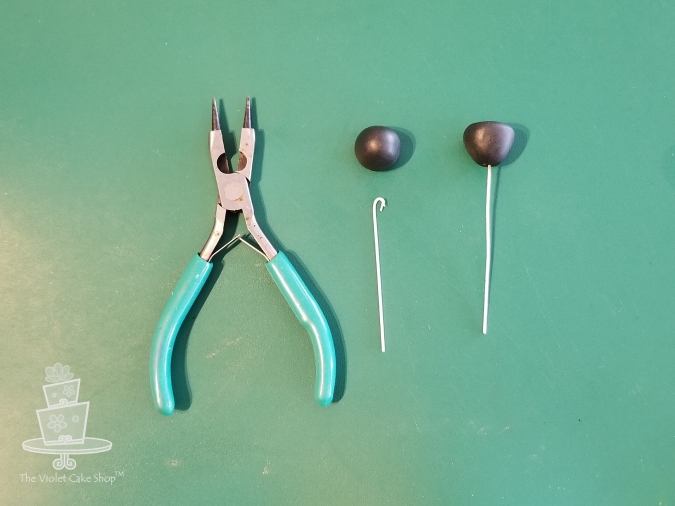
STEP 3 –
Roll out a small ball of black gumpaste approximately 2/3″ or 1.5 cm wide, to create the centre. Flatten the top slightly against your work surface.
Use the needle nose pliers to make a hook at the end of the 20 or 24 gauge floral wire.… Insert the hook end of the wire into the gumpaste ball, approximately halfway up.
**All Images, Content and Technique Ideas Property of The Violet Cake Shop™ – All Rights Reserved – 10/25/17**

STEP 4 –
Use the small end of a #2 piping tip to mark small circle details on the top surface of your centre.
TIP: hold the wire just under the gumpaste ball, to prevent the ball from slipping down the wire as you mark the top.
**All Images, Content and Technique Ideas Property of The Violet Cake Shop™ – All Rights Reserved – 10/25/17**
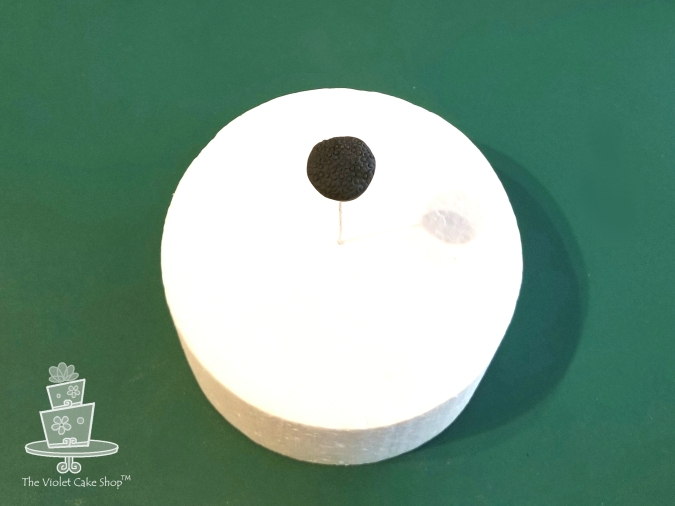
STEP 5 –
Insert into a styrofoam dummy to dry a few hours, until the gumpaste ball is set fairly firmly onto the wire.
**All Images, Content and Technique Ideas Property of The Violet Cake Shop™ – All Rights Reserved – 10/25/17**
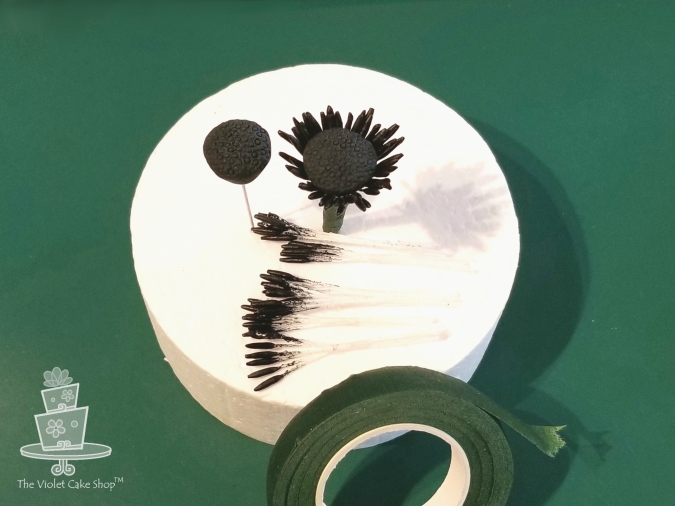
STEP 6 –
After a few hours, your centre should have set a bit and your dyed stamen should be fully dried.
Add your stamen bunches to your centre, one or two at a time, wrapping well with floral tape before adding the next bunches.… You will need approximately 6 to 7 bunches to go around your centre nicely.
**All Images, Content and Technique Ideas Property of The Violet Cake Shop™ – All Rights Reserved – 10/25/17**
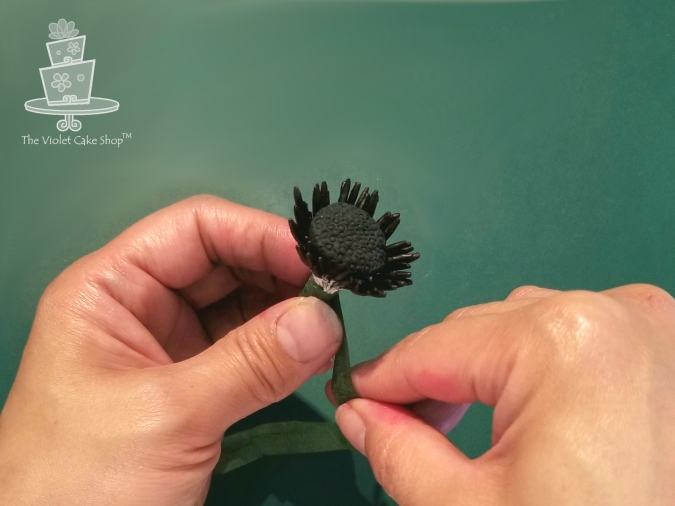
STEP 7 –
Once all the stamen are added, wrap the stem of your centre all the way down. Set aside to dry fully, overnight.
**All Images, Content and Technique Ideas Property of The Violet Cake Shop™ – All Rights Reserved – 10/25/17**
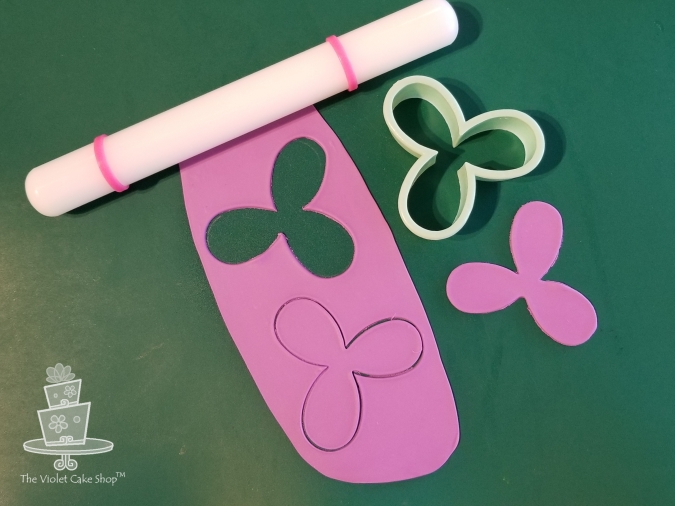
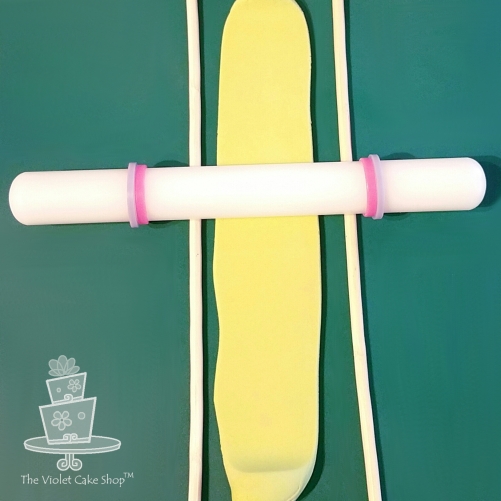
STEP 8 –
To create your petals, use a 3 petal cutter OR use a small oval cutter, 1.75″ long (refer to alternative steps 20 and 21).
First, colour your gumpaste with 2.5 parts deep pink to 1 part purple colouring. Next, roll out the gumpaste to 1/32″ or 1 mm thickness. … Next, cut out two cut outs using the three petal cutter. You will need four cut outs overall but work with two first, to prevent the petals drying out.
If using oval cutters, you will need two sets of 6 cut outs for a total of 12.
**All Images, Content and Technique Ideas Property of The Violet Cake Shop™ – All Rights Reserved – 10/25/17**
STEP 9 –
Using the large end of the ball tool and pressing gently, thin out the sides of the petals slightly, with the ball half on the paste and half on the foam pad.
**All Images, Content and Technique Ideas Property of The Violet Cake Shop™ – All Rights Reserved – 10/25/17**
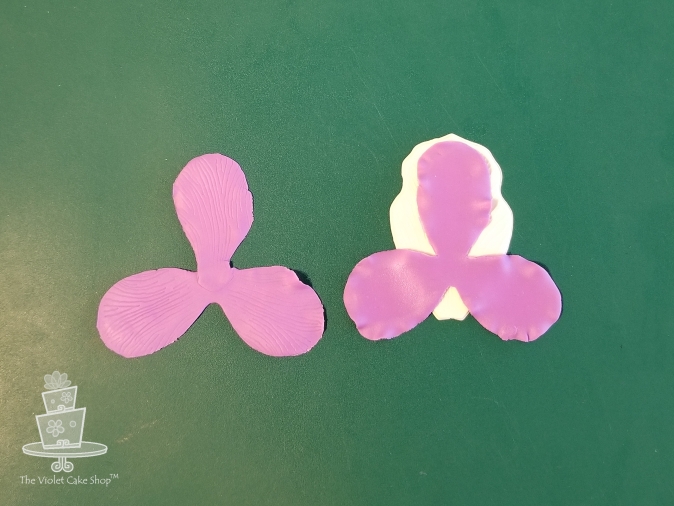
STEP 10 –
Use the veiner to imprint vein detail onto each of the 3 petals.
**All Images, Content and Technique Ideas Property of The Violet Cake Shop™ – All Rights Reserved – 10/25/17**
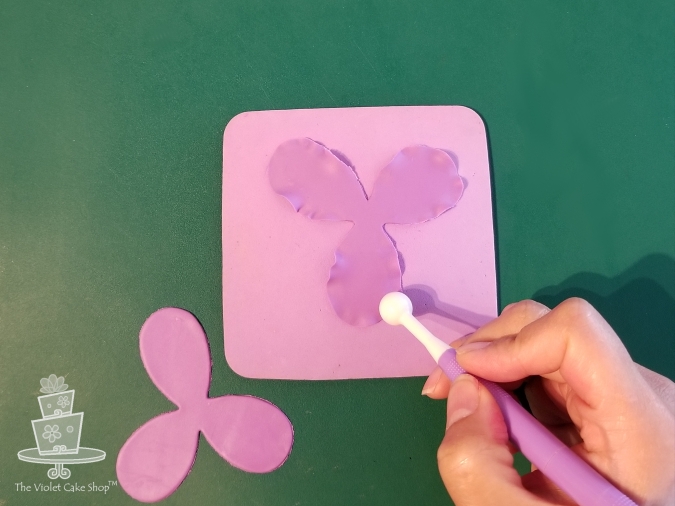
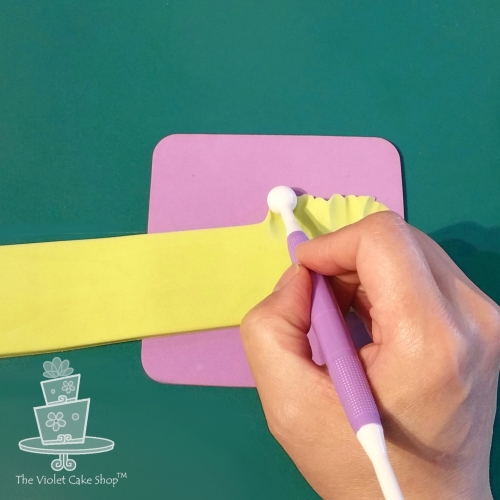
STEP 11 –
Frill the edges of your petals with the large end of your ball tool and mark two lines down the centre with the thin end of your dresden tool.
**All Images, Content and Technique Ideas Property of The Violet Cake Shop™ – All Rights Reserved – 10/25/17**
STEP 12 –
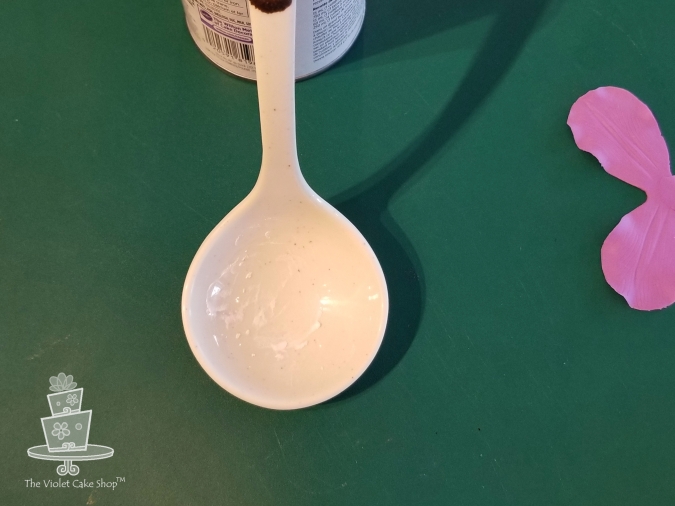
Use a Japanese soup spoon as a flower former. It is deep enough to create a lovely cupped shape and is the perfect size for the anemone flower.
Dust the cavity of your Japanese soup spoon with some cornstarch to prevent the gumpaste from sticking to the spoon as the petals dry.
**All Images, Content and Technique Ideas Property of The Violet Cake Shop™ – All Rights Reserved – 10/25/17**
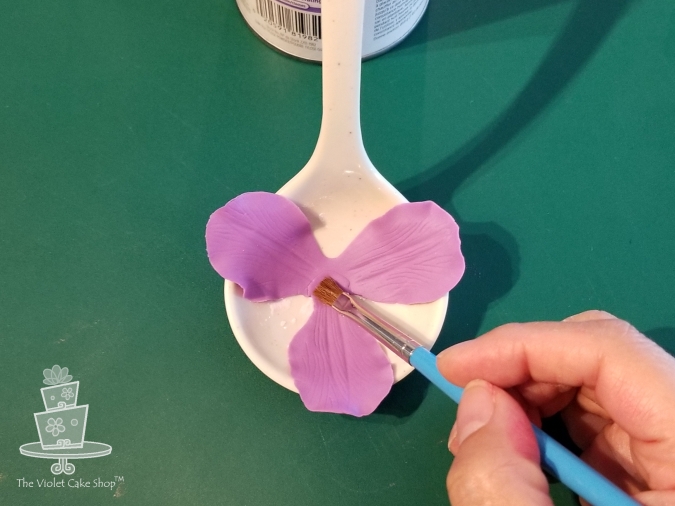
STEP 13 –
Lay the first frilled and veined 3 petal cut out into the cavity of the spoon. Using a brush, dab some water onto the very centre.
**All Images, Content and Technique Ideas Property of The Violet Cake Shop™ – All Rights Reserved – 10/25/17**
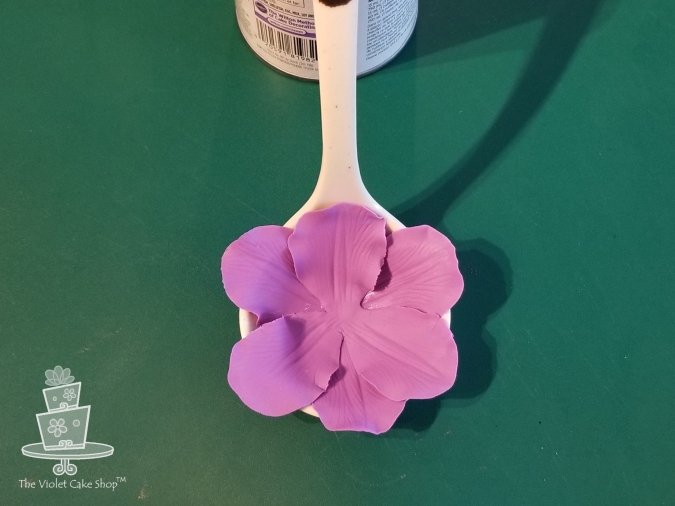
STEP 14 –
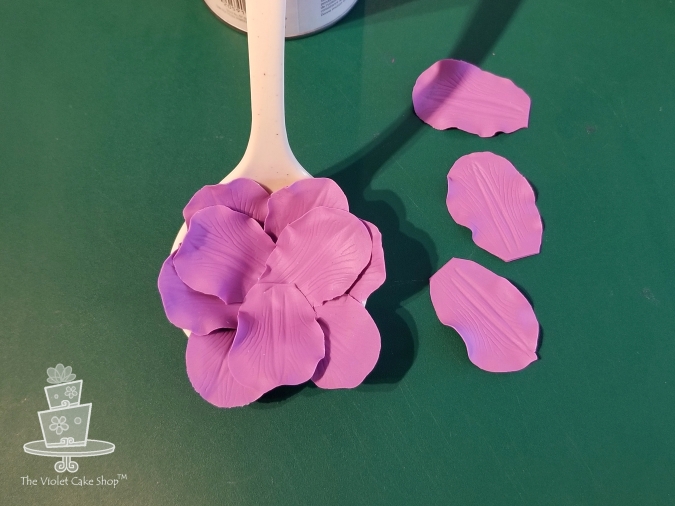
Place the second prepared 3 petal cut out on top of the first one, with the petals of the second set, in between those of the first set.
**All Images, Content and Technique Ideas Property of The Violet Cake Shop™ – All Rights Reserved – 10/25/17**
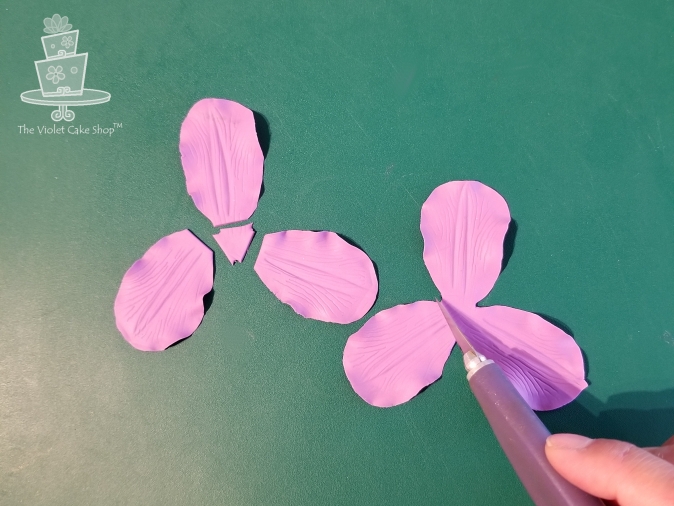
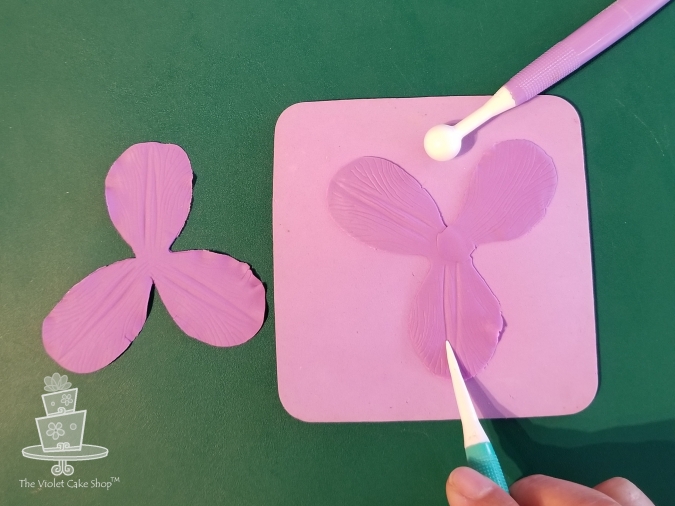
STEP 15 –
Repeat STEPS 8 to 11, to prepare a second set of petals. But for this set, you will need to cut the petals as shown so they are small enough that they can lay inside the petals of the first two sets.
**All Images, Content and Technique Ideas Property of The Violet Cake Shop™ – All Rights Reserved – 10/25/17**
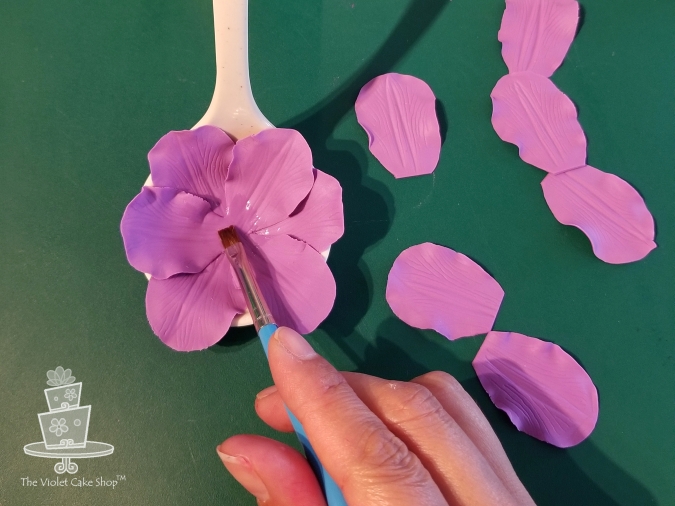
STEP 16 –
Add the petals individually. First, dab some water with a brush onto the centre, brushing slightly towards the petals, approximately 1/3 of the way up.
**All Images, Content and Technique Ideas Property of The Violet Cake Shop™ – All Rights Reserved – 10/25/17**
STEP 17 –
Position the first set of three petals evenly, in a trillium shape, in between two petals of those from the first set.
**All Images, Content and Technique Ideas Property of The Violet Cake Shop™ – All Rights Reserved – 10/25/17**
STEP 18 –
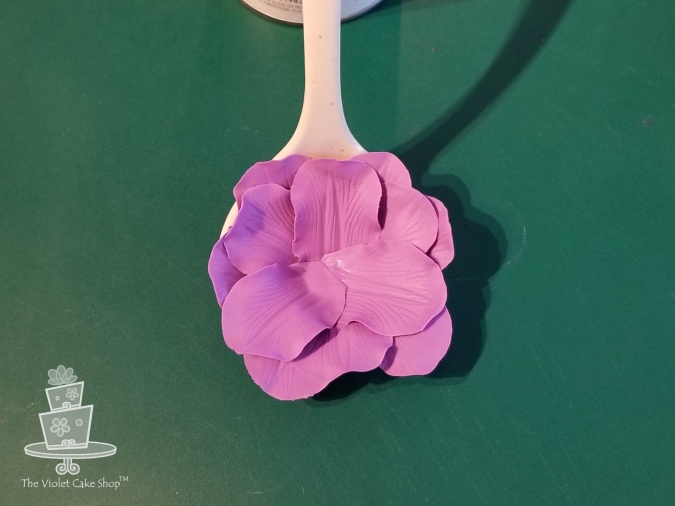
Position the second set of three petals evenly on top of the first set.
**All Images, Content and Technique Ideas Property of The Violet Cake Shop™ – All Rights Reserved – 10/25/17**

STEP 19 –
Add some small pieces of paper towel in between the petals to add some movement and shape to the petals.
Using a #12 piping tip, cut out a small circle in the very centre of all the petals and set aside to set for about half an hour.
**All Images, Content and Technique Ideas Property of The Violet Cake Shop™ – All Rights Reserved – 10/25/17**
(ALTERNATIVE) STEP 20 – If you do not have a 3 petal cutter as shown, use STEPS 20 and 21 instead to create petals.
Use a 1.75″ long oval cutter to cut out 12 petals total. Work with 6 at time, to vein and frill the petals.
**All Images, Content and Technique Ideas Property of The Violet Cake Shop™ – All Rights Reserved – 10/25/17**
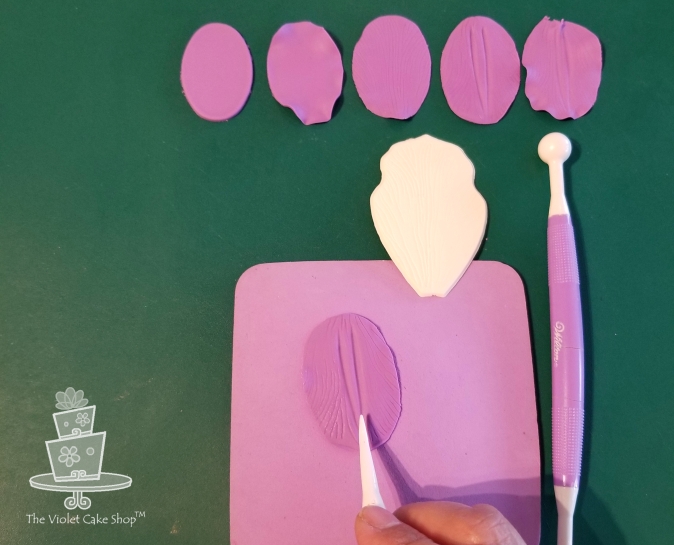
(ALTERNATIVE) STEP 21 – If you do not have a 3 petal cutter as shown, use STEPS 20 and 21 instead to create petals.
Frill and vein the petals as shown. The first petal is untouched. Thin the sides with the ball tool, vein with the veiner, mark the centre details and frill the edges.
Cut out a small circle of gumpaste to sit under the petals. Add each petal on top of the circle gumpaste in a similar position as that shown in STEPS 13, 14, 17 and 18.
**All Images, Content and Technique Ideas Property of The Violet Cake Shop™ – All Rights Reserved – 10/25/17**
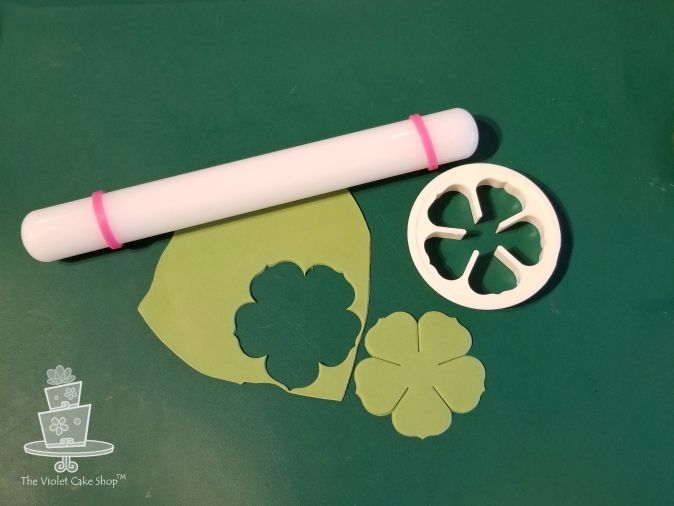
STEP 22 –
After the flower petals have had a chance to set, start making your calyx.
Create the calyx using a 5 petal cutter.… Roll out some green gumpaste to 1/32″ or 1 mm thickness. Use the 5 petal cutter to cut out one shape.
**All Images, Content and Technique Ideas Property of The Violet Cake Shop™ – All Rights Reserved – 10/25/17**
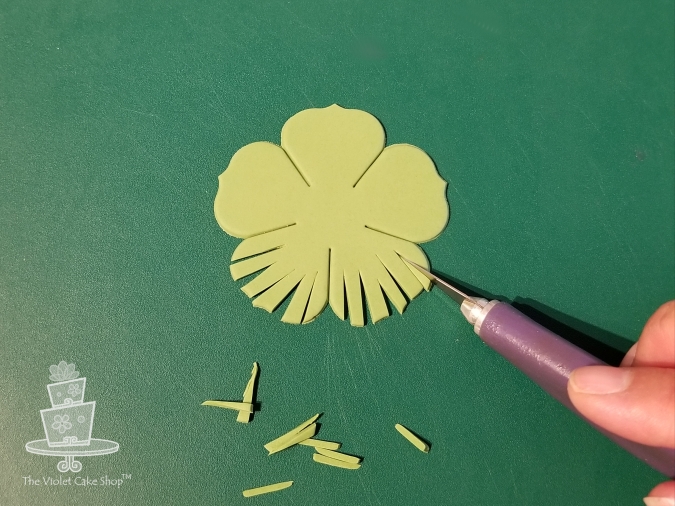
STEP 23 –
Using your craft or exacto knife, cut out slits in the petals as shown.
**All Images, Content and Technique Ideas Property of The Violet Cake Shop™ – All Rights Reserved – 10/25/17**
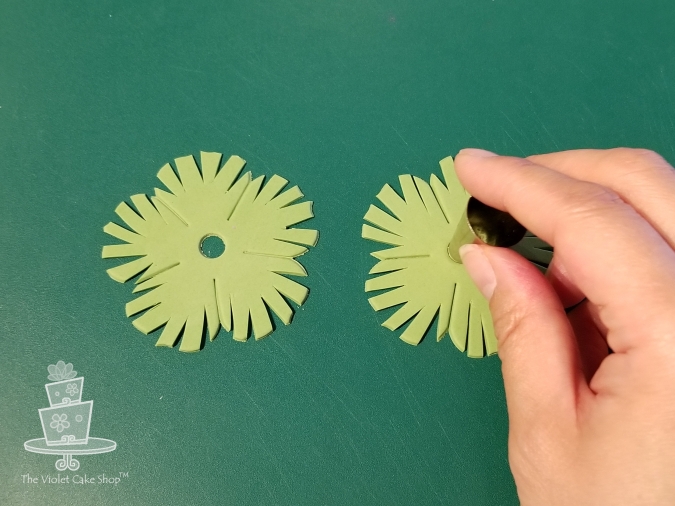
STEP 24 –
Use the #12 piping tip to cut out a hole in the centre.
**All Images, Content and Technique Ideas Property of The Violet Cake Shop™ – All Rights Reserved – 10/25/17**
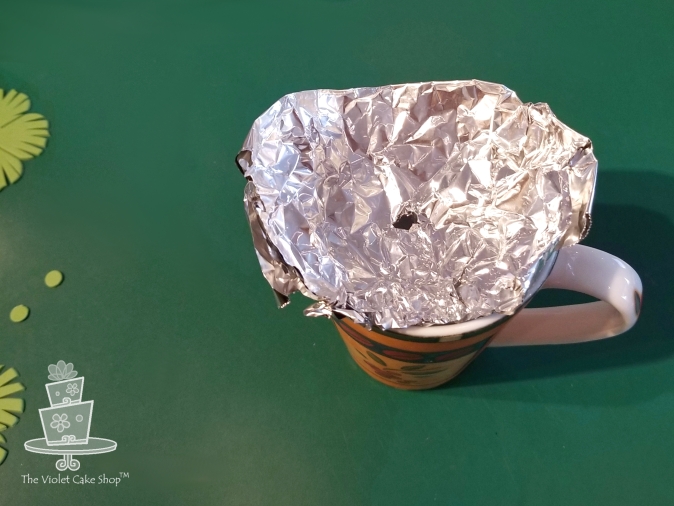
STEP 25 –
Shape some folded aluminum foil into the same cupped shape as a Japanese soup spoon and place on top of a cup. Poke a hole in the centre with something pointed, like a skewer.
**All Images, Content and Technique Ideas Property of The Violet Cake Shop™ – All Rights Reserved – 10/25/17**

STEP 26 –
Dab some water around the centre of the prepared calyx cut out, brushing outwards.
**All Images, Content and Technique Ideas Property of The Violet Cake Shop™ – All Rights Reserved – 10/25/17**
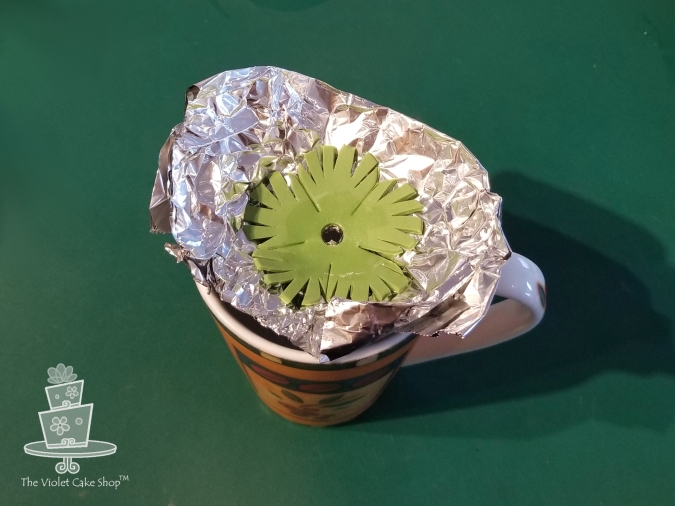
STEP 27 –
Place the calyx in the foil cavity. Gently remove your flower petals from the Japanese spoon former. The petals may still be a bit soft but that’s ok so long as you are gentle.
Place the flower petals on top of the calyx where the water was dabbed and ensure the petals adhere to the calyx. … Add some water to the centre of the semi-set petals and insert your prepared flower centre. You may need to add some fresh fondant if the petals are too dry.
**All Images, Content and Technique Ideas Property of The Violet Cake Shop™ – All Rights Reserved – 10/25/17**
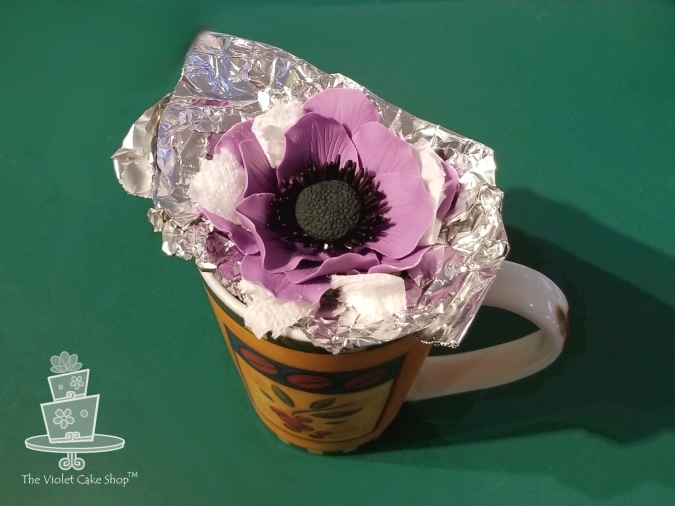
STEP 28 –
Reposition the paper towel bits between the petals and leave to dry overnight.
Once fully dried, dust as desired to bring more life to your flower.
**All Images, Content and Technique Ideas Property of The Violet Cake Shop™ – All Rights Reserved – 10/25/17**
(Note: these are my own techniques developed independently with my own ideas and shared for personal use ONLY. They are not to be used for monetary gain or to develop products, books, DVDs, downloads or lessons for sale or to be taught in classes or tutorials, whether hands-on, on-line, in video format or in print without express written consent.)
I hope this will come in handy for those of you out there that are new to decorating and sugar flowers! Please keep in mind that I tend to try things out on my own so these techniques are ones I’ve come up with and are not the only way to create this flower, nor are they necessarily the best. But they are shared for those who might not have other resources or who just want to use what is easily available.
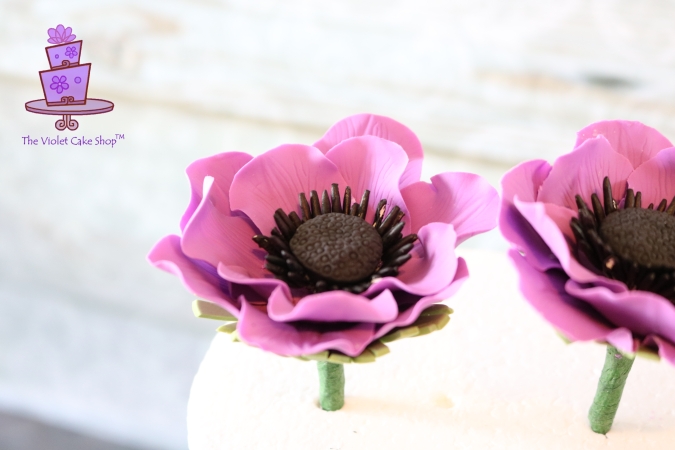
So please use for your own pleasure and I hope you ENJOY! Remember, you can always share your creations with me on my Facebook page. I love seeing what you create using one of my tutorials!
Happy Caking Y’ALL!!


You must be logged in to post a comment.