Well, it has been just over 3 weeks since the launch of my V-Petal Ruffle Simpress® and I am overwhelmed by the positive response and excitement that the new mold has generated! I am so humbled to think that a technique I created and first shared here, over 6 years ago, has been turned into a mold and is being sold around the globe! I’m pinching myself as I still can’t believe it actually, finally, happened after 2 years of planning and a few set backs due to COVID.
I am incredibly touched, seeing SO many beautiful designs created with our new mold, and am constantly being ‘wowed’ and impressed by the creativity and versatility of the cakes being made. I’ve been sharing a lot of those cakes on my Instagram and Facebook Stories and will share a few of them here, in a future post. But first, a huge THANK YOU to all who have purchased the mold and to those who have shared what they’ve created with it! I am so proud, overwhelmed and full of all kinds of emotions right now, seeing how it’s being used and the great response so far.
So, I did promise a mini-tutorial for the Tropical Flamingo head from one of the two cakes I made to accompany the initial launch.
I filmed the individual elements, including how to create three varieties of tropical leaves and two blossoms, along with how to create the head and compiled it into a real-time video that is just over 30 minutes long, with some steps highlighted, which I’ve uploaded to my YouTube channel. You can view the video here. I also sped it up, and that shortened version has been posted on my Instagram and Facebook pages.
Along with the videos, I took a few shots of some of the steps which I am sharing below. You can also find the template for the Tropical Flamingo head at the end of this post. But for the full idea of how to shape the head, it’s best to view the videos since explaining it in a few images and words, does not do it justice.
I hope these steps are helpful if you decide to create your own Tropical Flamingo cake! Remember, the V-Petal Ruffle Simpress® is PERFECT for creating the body of the Flamingo. You can check out this video from Marvelous Molds® on how to use our new mold, which also contains great tips and their best practices. However, you can also always use any ruffle or textured technique, or mold, to mimic the idea for the Flamingo body.
And now for the Tropical Flamingo Mini-Tutorial – ENJOY!
Note: these are my own techniques developed independently with my own ideas and shared for personal use ONLY. They are not to be used for monetary gain or to develop products, books, DVDs, downloads or lessons for sale, or to be taught in classes or tutorials, whether hands-on, on-line, in video format or in print, without express written consent.)
Before starting, treat your fondant with Tylose to make it easier to mold and shape, as well as to allow it to dry faster. You can also use 50/50 gumpaste/fondant mix instead.Roll the paste bewteen your palms to get a log shape with a thicker bulb on one end. Use fingers to shape and elongate the ‘neck’ area. Curve the neck using your fingers.Continue shaping with your hands to bring out the desired shape. Use the template as a guide once you have the initial shape formed.Lay the initial formed paste on the template to gauge size and continue shaping with a Dresden tool and your hands. Continue shaping and smoothing out the paste with fingers.Once the shape is where you want it, use your palms to flatten the head and neck a bit and continue to smooth out the paste. Next, add the eye and eyelashes and use a 1A piping tip to cut off the bottom where the beak will go.Next, take some lighter pink paste that has been treated with Tylose and create a cone shape that will be used as the top portion of the beak.Shape the paste between your palms to achieve the cone shape. Smooth out the wide end.Place the shaped beak to the end of the Flamingo head.Use the 1A piping tip to cut off the bottom portion of the beak.Take some black paste fortified with Tylose, and create a smaller cone shape than the pink one made earlier.Shape it as you did with the pink one made earlier. If necessary, remove excess paste until the desired size is achieved.Once happy, adhere the pieces with water or edible glue and set the head aside on wax paper, to dry, overnight or minimum 12 hours.
And here is the Flamingo Head Template below – after saving to your computer, you can resize it to the size you want, before printing.
The size of the head used on my cake was just over 6″ tall. My cake tiers were 5″ tall each and the 6″ height was perfect to just peek over the top edge of the top tier.
Here is a photo of the other elements covered in my video.
I hope you’ve enjoyed this tutorial. Please share if you use it. I would love to see what you create. You can always tag me or use #thevioletcakeshop on Facebook and Instagram.
And….HAPPY CAKING Y’ALL!!
Note: these are my own techniques developed independently with my own ideas and shared for personal use ONLY. They are not to be used for monetary gain or to develop products, books, DVDs, downloads or lessons for sale, or to be taught in classes or tutorials, whether hands-on, on-line, in video format or in print, without express written consent.)
It has been a LONG, LONG, LONG, LONG (ok, y’all get it lol!) LONG time since I’ve posted anything on my blog. My last post was in April 2020 when I shared a couple of tutorials that I made FREE for use, during the COVID pandemic. Well…the pandemic is still on-going, at different stages in different countries, almost 2.5 years later, but for the most part things are opening up or have opened back up now. Having gone through such a prolonged pandemic though, (as I’m sure is the case with everyone) SO much has changed!
For those who’ve not followed along on my Facebook and Instagram, I officially hung up my cake decorating hat/apron/rolling pin, last year, and moved on from creating new cake designs and tutorials, and from teaching. The worldwide shutdowns had a huge impact on SO many promising teaching opportunities, classes and demos that I already had planned and scheduled. During the ‘downtime’, I did a lot of reflecting and I realized that I really did not want to be travelling all the time and be away from my family as much as I would have had to, if COVID had not disrupted my plans. It also helped me realize that my level of creativity was at such a low-point, that cake decorating just wasn’t as satisfying, inspiring/invigorating (or more importantly) FUN for me as it was before, even to do as a hobby. I will of course make the odd cake here and there for personal occasions – like recently for my daughter’s big 10th birthday (see end of post for the pic) – but for the most part, my plan now, is to take a big, long break from decorating and spend my energy instead, taking care of the kiddos and trying to help grow the business my hubby started almost 19 years ago with a few business partners. We’ve recently restructured the business and made huge changes, so now we have lots of new ideas and big plans for where it will go from here. We were fortunate that the pandemic did not negatively affect our business for long, so at least I now have something to fall back on and redirect my focus to.
Though most of my plans involving cake were interrupted, there IS one opportunity that was already in the works just as the pandemic started, that luckily did not fall through, and it is the one I was most excited about! The parameters of our initial agreement did change a bit because of the impacts of the COVID shutdowns, but given my current situation, it was an opportunity I just could not pass up, as it would help cement my legacy in this industry that I spent over 13 years in.
The big news is already out on my Facebook and Instagram pages, but for those who haven’t heard yet, I have partnered with Marvelous Molds® (one of my most favourite companies) to bring you a new Simpress® mold that was inspired by my signature V-Petal Ruffles technique, a technique which has been shared SO many times on this blog! YIKES, I was so excited and stoked when they reached out to me saying they wanted to come up with their version of my ruffle technique and asked me if I would like to collaborate! How could I say no? It was super hard not to let the cat out of the bag before we launched it yesterday, especially since we had to put our initial plans on hold for almost 2 years!
Along with providing feedback and suggestions and testing out the prototype, I created two new designs using the mold, to showcase its versatility and for use in the packaging and product promo. After working with it, I have to say, it is AN ABSOLUTE TIME-SAVER and was such a pleasure to use! It almost makes me want to come out of ‘retirement’ hahaha! In all seriousness though, it was the first time in YEARS where I felt inspired to come up with new designs. It’s so easy to use and saved me so much time that I was able to devote more of my time to the actual act of designing. I couldn’t be happier with the quality and calibre of the the mold and it really makes decorating more pleasurable and such an ease!
For those who have used my V-Petal Ruffle technique, you will know that it is a very time-consuming process that does require a bit of patience to execute. The results are so gratifying though, that it makes the time spent, well worth it. But it does often mean HOURS spent hand-folding the ruffles and applying them all individually. Well, this new mold cuts that down to a FRACTION of the time, while maintaining the intricate details! I was able to cover a 7″ tier in less than an hour, which would have taken almost 5 hours using my original method.
Even better, it is the first of their molds that is 6″ in height, which was one of my suggestions, and which is perfect for those taller cakes! But it still works for shorter cakes too – you just fill the mold with a shorter panel of fondant and trim any excess off the top edge, after you panel it onto your cake.
I already shared one of the new cakes I designed using the new V-Petal Ruffle Simpress® on my social platforms, but I am sharing the second one here first!
This flamingo design has been an idea floating in my brain for years, but it never cemented into an actual design until I thought of what creative way I could use the new mold for.
As you can see, I’ve used the ruffled tier as the ‘body’ of the flamingo. This new V-Petal Ruffle Simpress® is PERFECT for simulating the feathers of any bird design you might have in mind. This same idea can be used for swan or peacock themes as well, just to name a few! It would be great too to use as the background for foliage in any tropical cake. SO many ideas popping into my head for how to use this mold. As I said before, it ALMOST makes me want to come out of retirement lol.
If you would like to get this new mold, you can check out my affiliate link here or look for it at your local decorating store that carries Marvelous Mold® products. If your favourite local decorating spot doesn’t have it yet, you can always ask them to stock it.
This is the other design I created to showcase the versatility of the new V-Petal Ruffle Simpress®. As you can see, this mold can be used for elegant designs, to fun designs, to anything you can come up with in between!
Look at those AMAZING details!!
I hope you guys love this mold as much as I do! I would love to see what you create using it. You can always share them with me by tagging my page in your posts. Who knows, I might just share some!
I also wanted to take this time to THANK EVERYONE from the bottom of my heart for your love and support over the years that I’ve been sharing my work. You have all made me feel LOVED, appreciated and like an important part of the cake community. Without your support, comments, likes and engagement, I NEVER would have had the opportunities I’ve had, nor the nerve to put my work out there and embark on these adventures! Thanks again and LOVE to you ALL!
Stay tuned, as I plan to do a mini-tutorial on the flamingo head…just need to find some time to sit down and get it filmed…
In the meantime, HAPPY CAKING Y’ALL!
Oh and finally, as promised….my daughter’s cake…
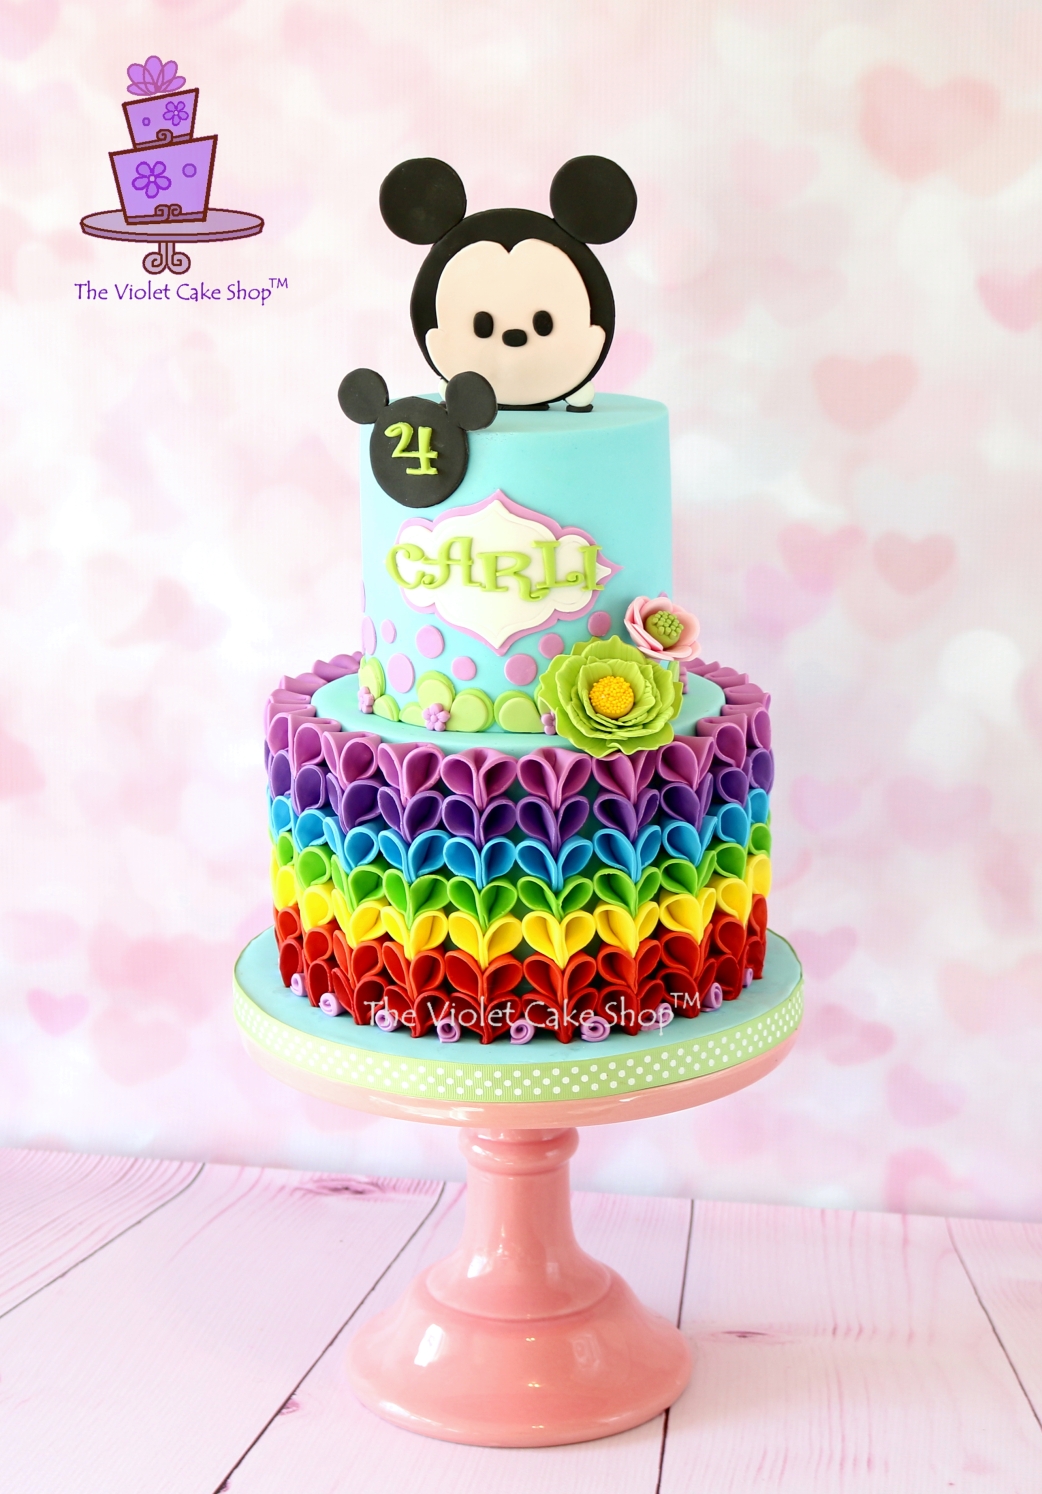
She turned the BIG double digits 10!!! in July, and this is her cake. Ya know, I still have to make her her custom cakes even though I’ve officially ‘retired’ from caking…AND as you can see, she STILL loves Tsum Tsums! She helped me design this in every aspect – colours, placement of ruffles, style of name and age, and which Minnie Tsum Tsum should be the star! She chose Royal Minnie from the Tsum Tsum game.
This is an unprecedented time we are in right now. We are all being swept up in the uncertainty, anxiety, fear and unknown that this Covid-19 pandemic has placed upon us. Many countries are in some form of lockdown or being asked to actively practice social distancing. We are experiencing panic-buying and increased price-gouging and even Covid-19 related scams. But we are also experiencing acts of kindness and compassion.
This impacts all of us in immeasurable ways. Each one of us are dealing with it differently but one thing is for sure, there are many that are anxious because this is a time of the COMPLETE unknown.
So to hopefully provide some cheer, distraction and bring a bit of sunshine, I have finally put together a long-intended paid PDF tutorial. But I am sharing it for FREE here on my blog and in an Album on my Facebook page. I also will have it available as a downloadable PDF in my e-Shop for those who would prefer an easy to print and save version, for a minimal fee.
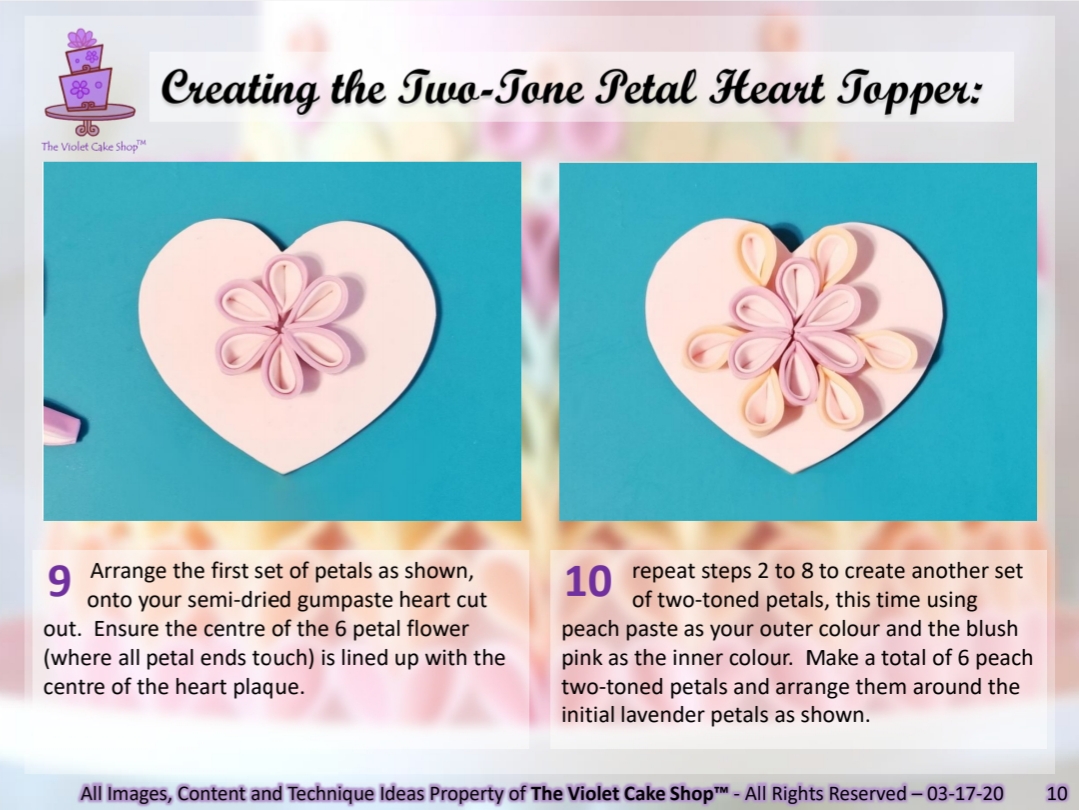
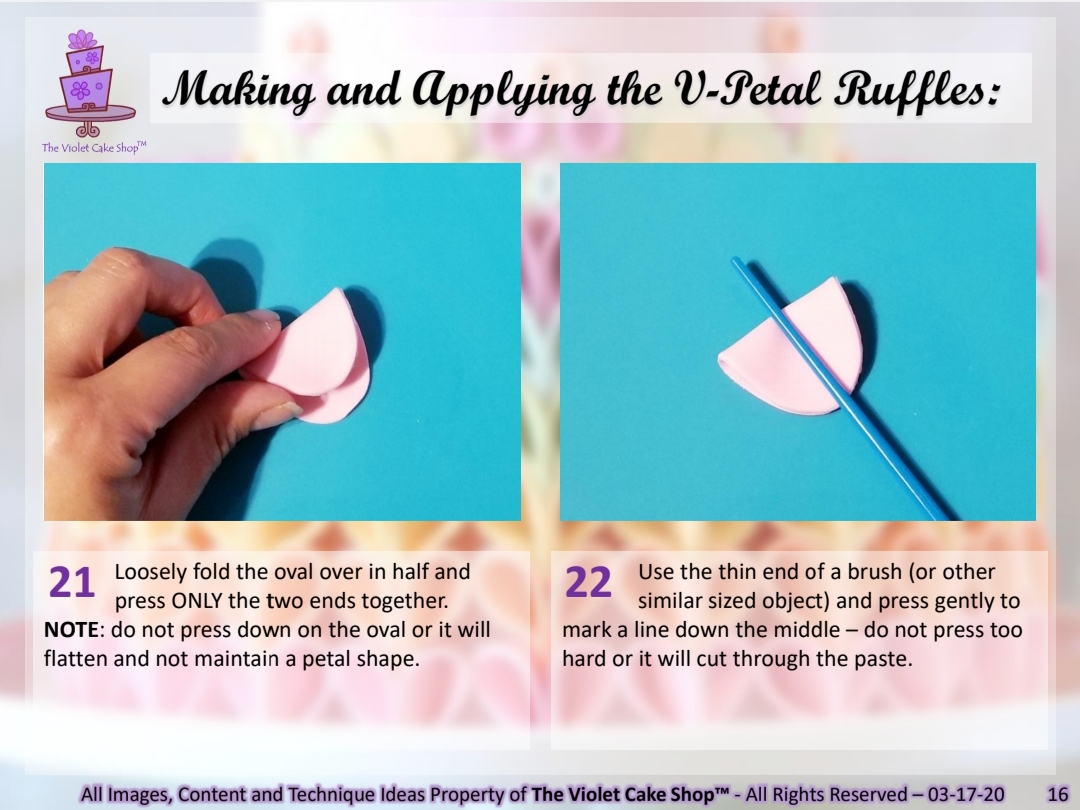
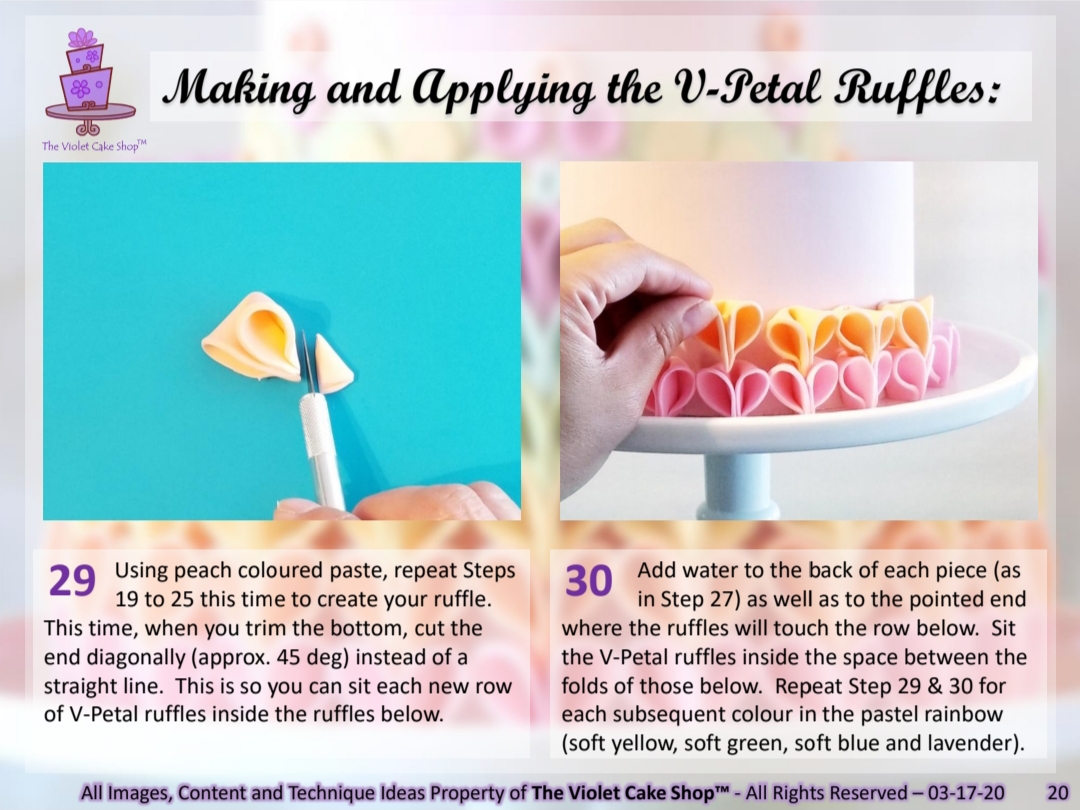
It goes through one of my most popular and well-liked cake designs which also happens to be one that has fun and happy colours. It features my signature V-Petal ruffles which can be used in so many ways. I have shared another mini-tutorial of this technique here on this blog but this tutorial also covers a versatile technique for creating a standing heart topper.
I hope this brings some cheer and joy and maybe hours of distraction.
STAY SAFE my friends, BE KIND and remember to do your part and WASH your hands. Much love to all! And most importantly, HAPPY CAKING Y’ALL!
Tutorial below:
(Note: these are my own techniques developed independently with my own ideas and shared for personal use ONLY. They are not to be used for monetary gain or to develop products, books, DVDs, downloads or lessons for sale or to be taught in classes or tutorials, whether hands-on, on-line, in video format or in print without express written consent.)
(Note: these are my own techniques developed independently with my own ideas and shared for personal use ONLY. They are not to be used for monetary gain or to develop products, books, DVDs, downloads or lessons for sale or to be taught in classes or tutorials, whether hands-on, on-line, in video format or in print without express written consent.)
It’s SO bittersweet as she is now no longer a baby and she is my last so I’m gonna miss that aspect, but by the same token she is now onto a bigger, better and more adventurous phase of her life! She has always had such a big personality though with SO many interests so it’s hard sometimes to come up with one theme for her cakes.
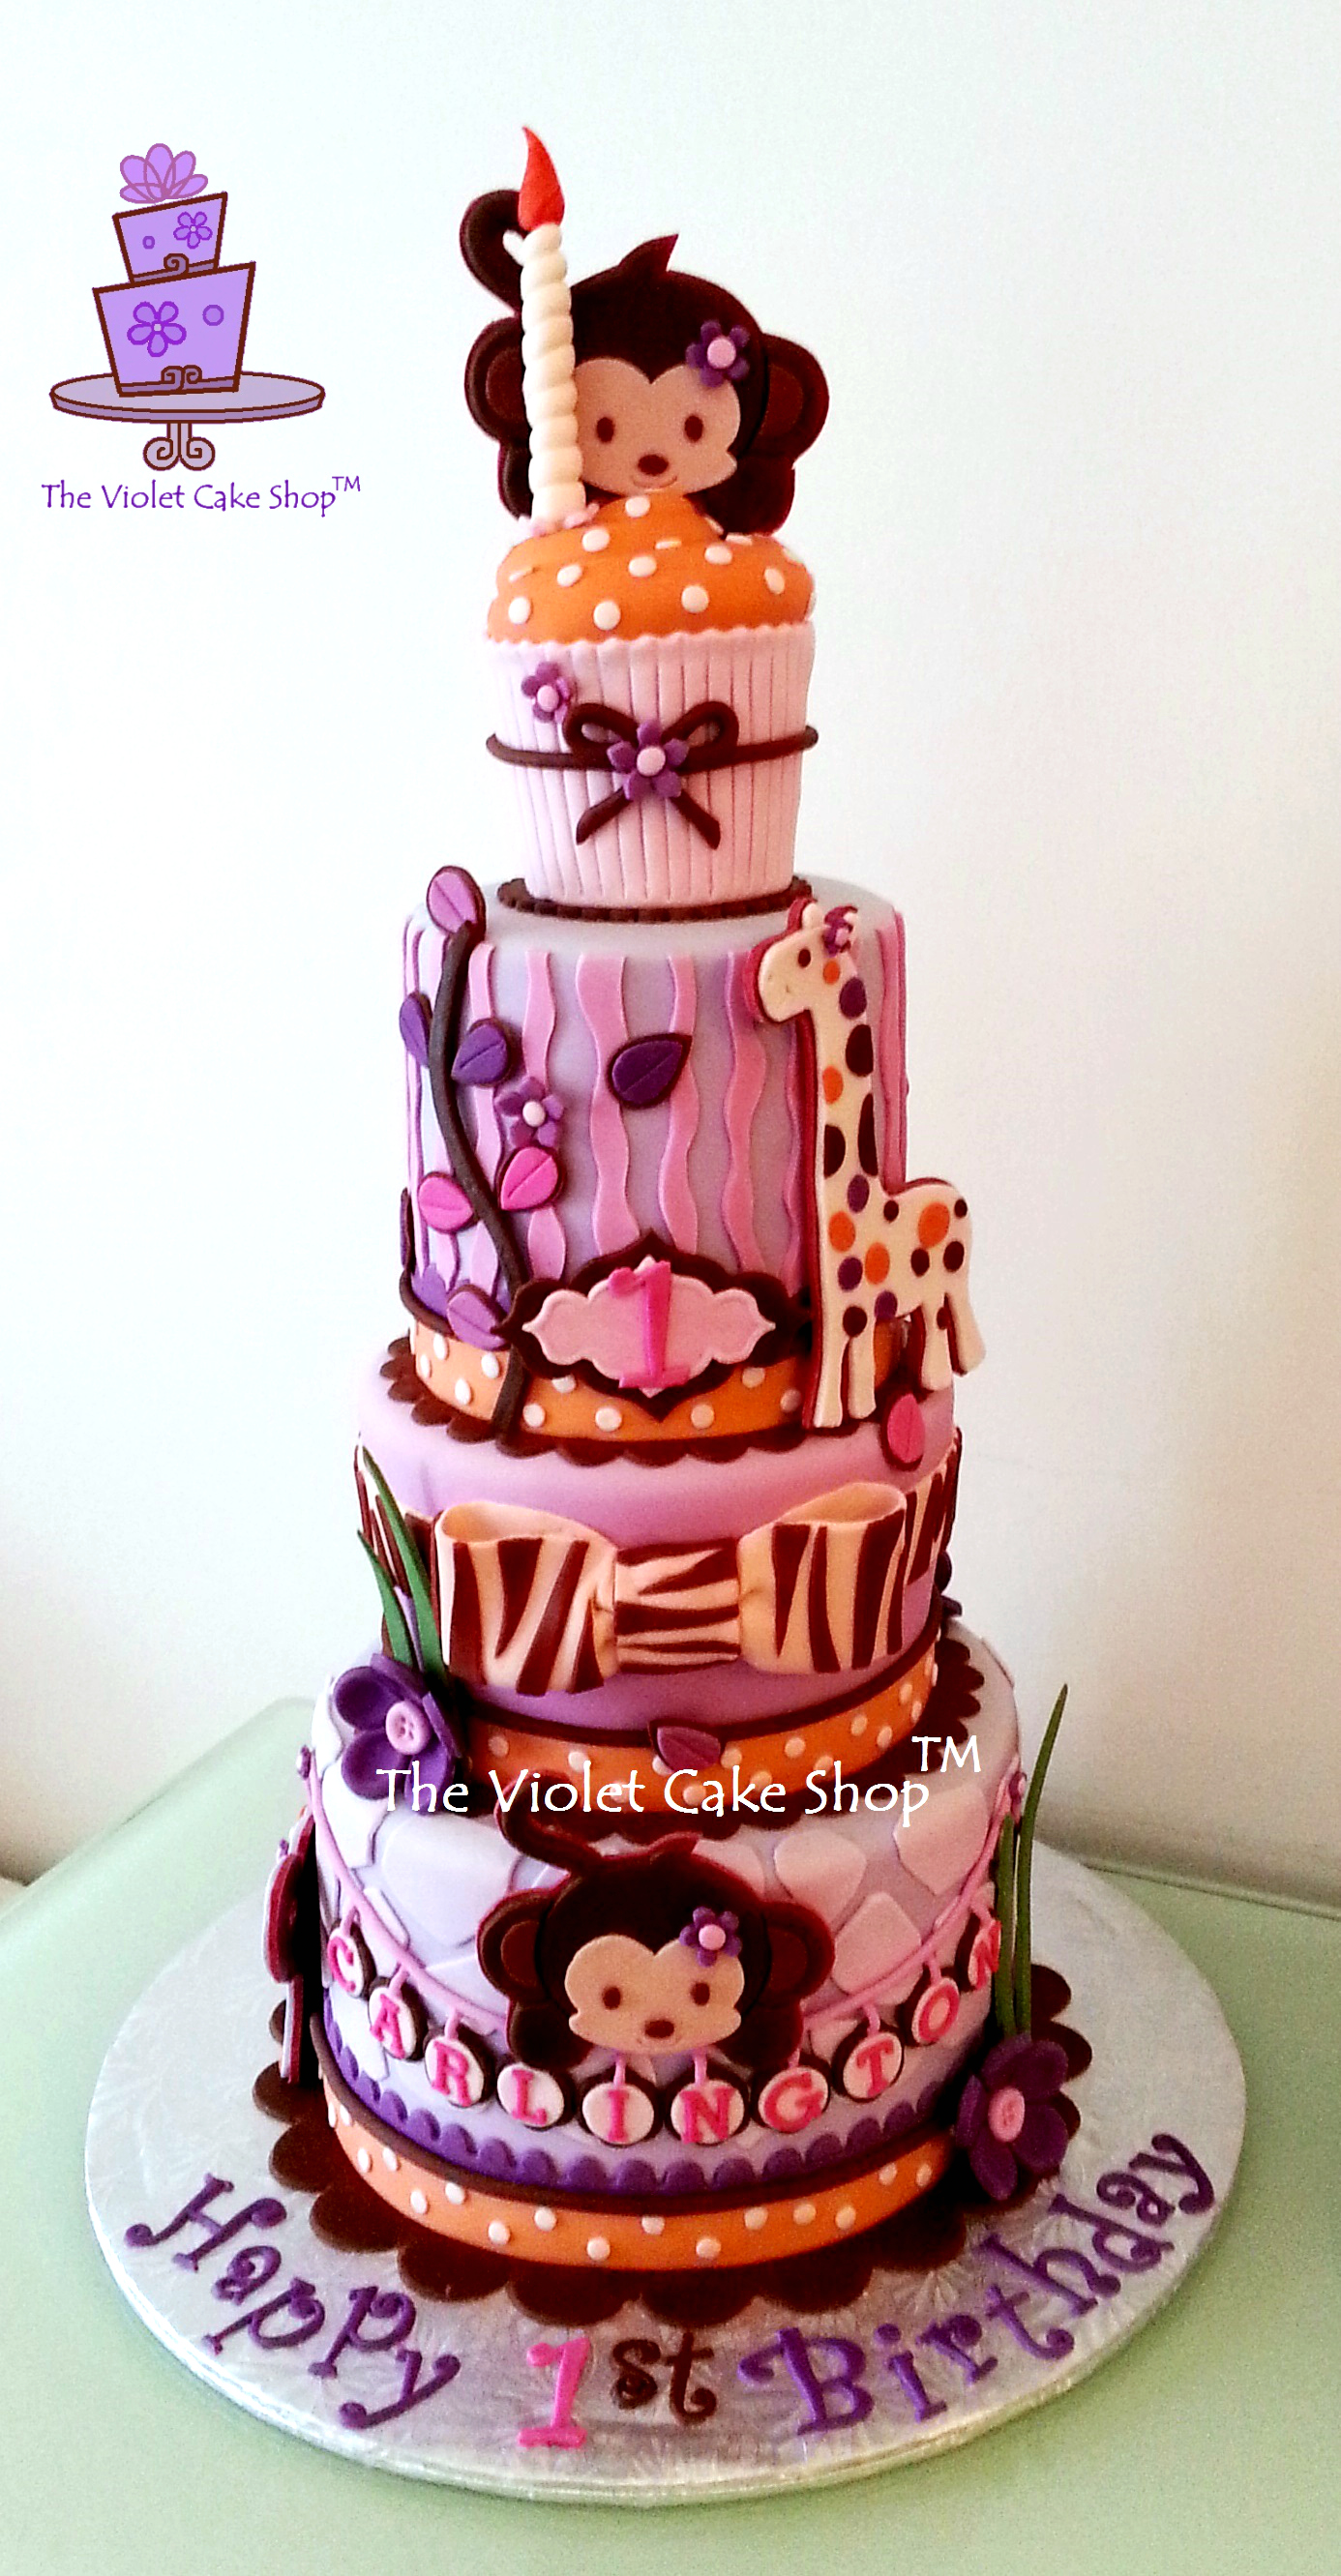
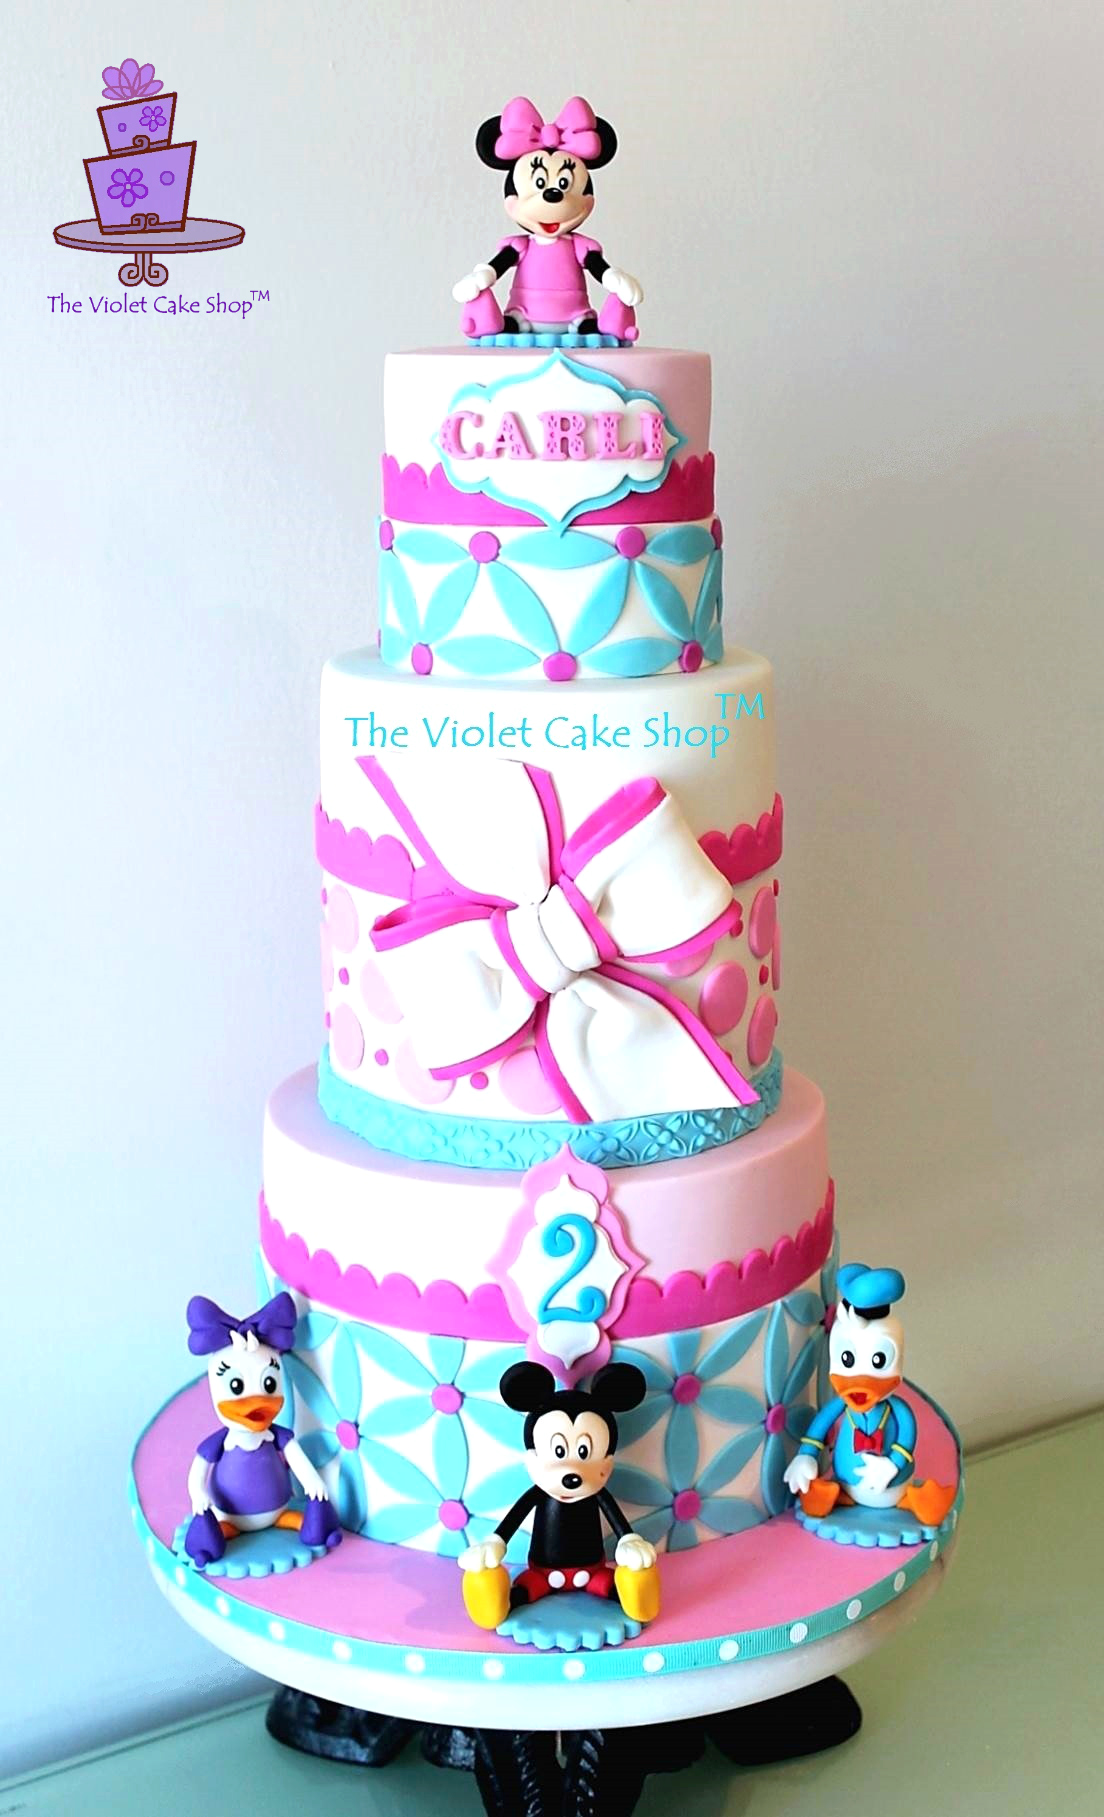
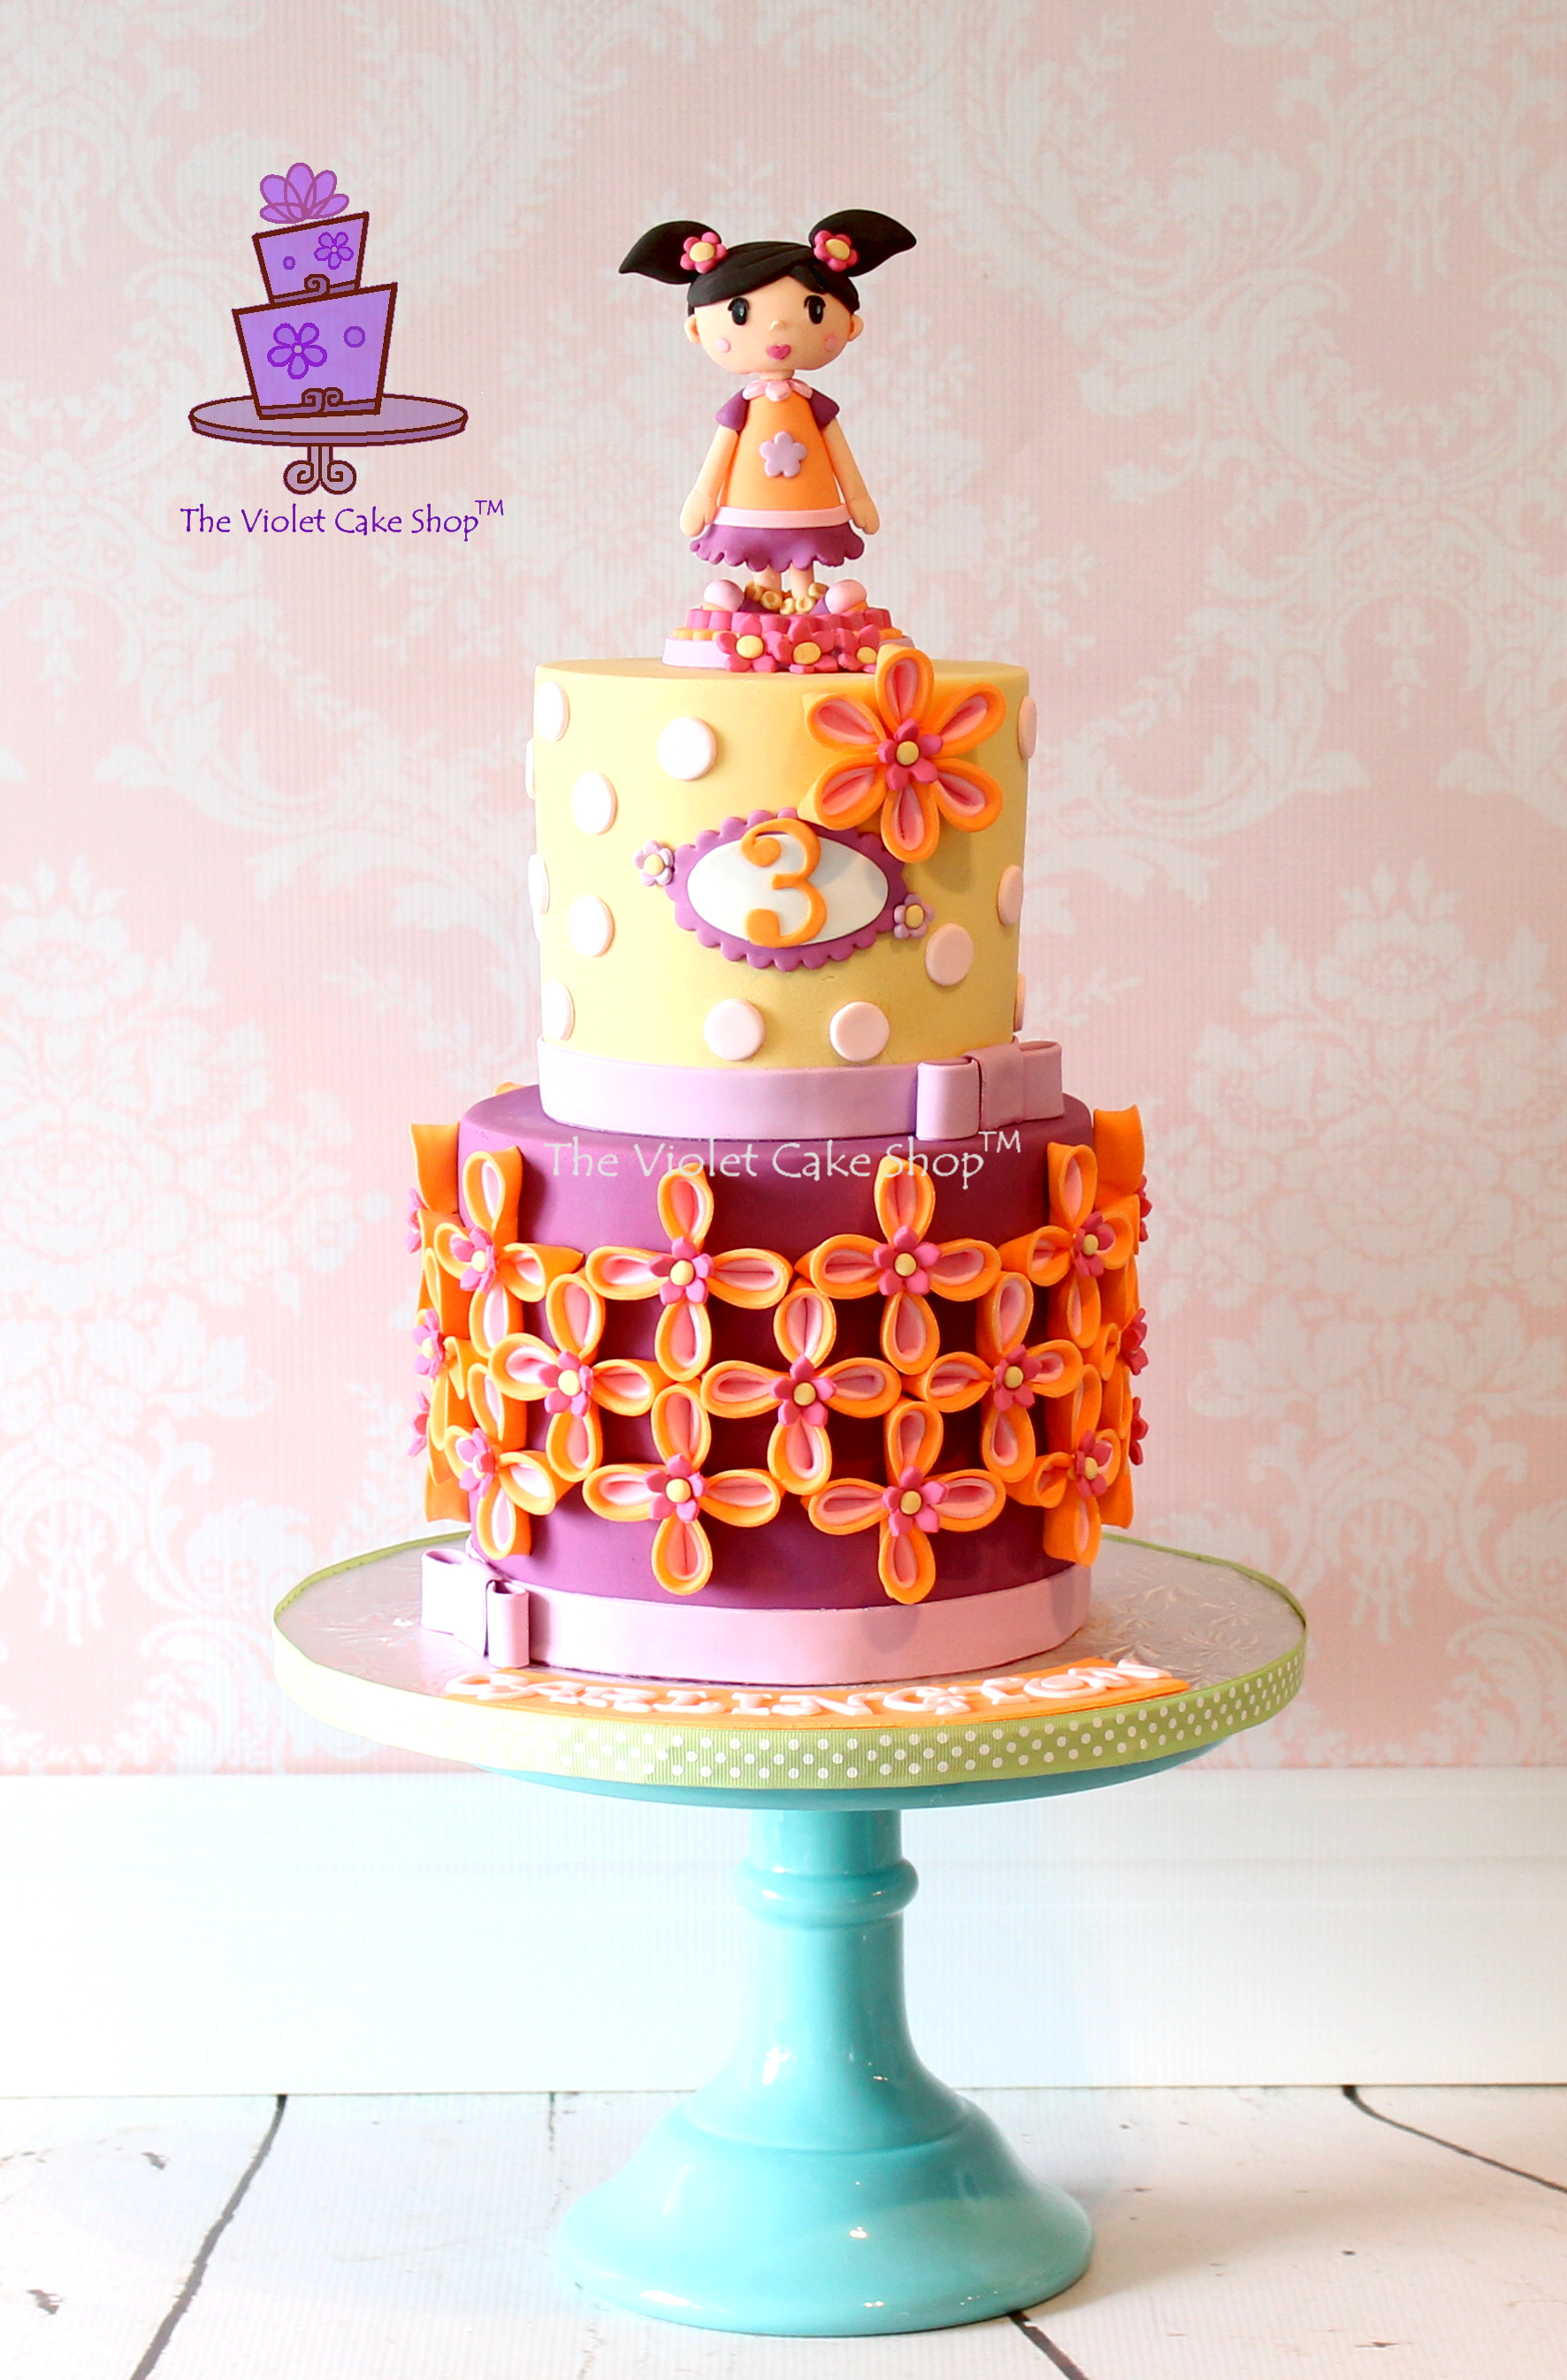
The last three cakes were completely up to me, so I have been lucky that I got to do what I wanted to with the designs haha. Of course I always tried to include things I know she loves like characters from her comforter for her 1st birthday, Mickey Mouse and the gang on her 2nd birthday cake and purple and yellow, two of her favourite colours, on her last cake.
This year though, I was really stumped… She loves alphabets and numbers but I felt that might be a tad boring for a cake. She loves Legos and Minecraft but I really didn’t want to do either of those because of all the potential dots or piddly squares which in either case, would entail a case of total “tedium-boredom” with the addition of crossed-eyes for weeks haha. She loves all kinds of shows but there isn’t one clear cut favourite. She does love Mickey still and always has, but again for selfish reasons I wasn’t inclined to do another Mickey cake either.
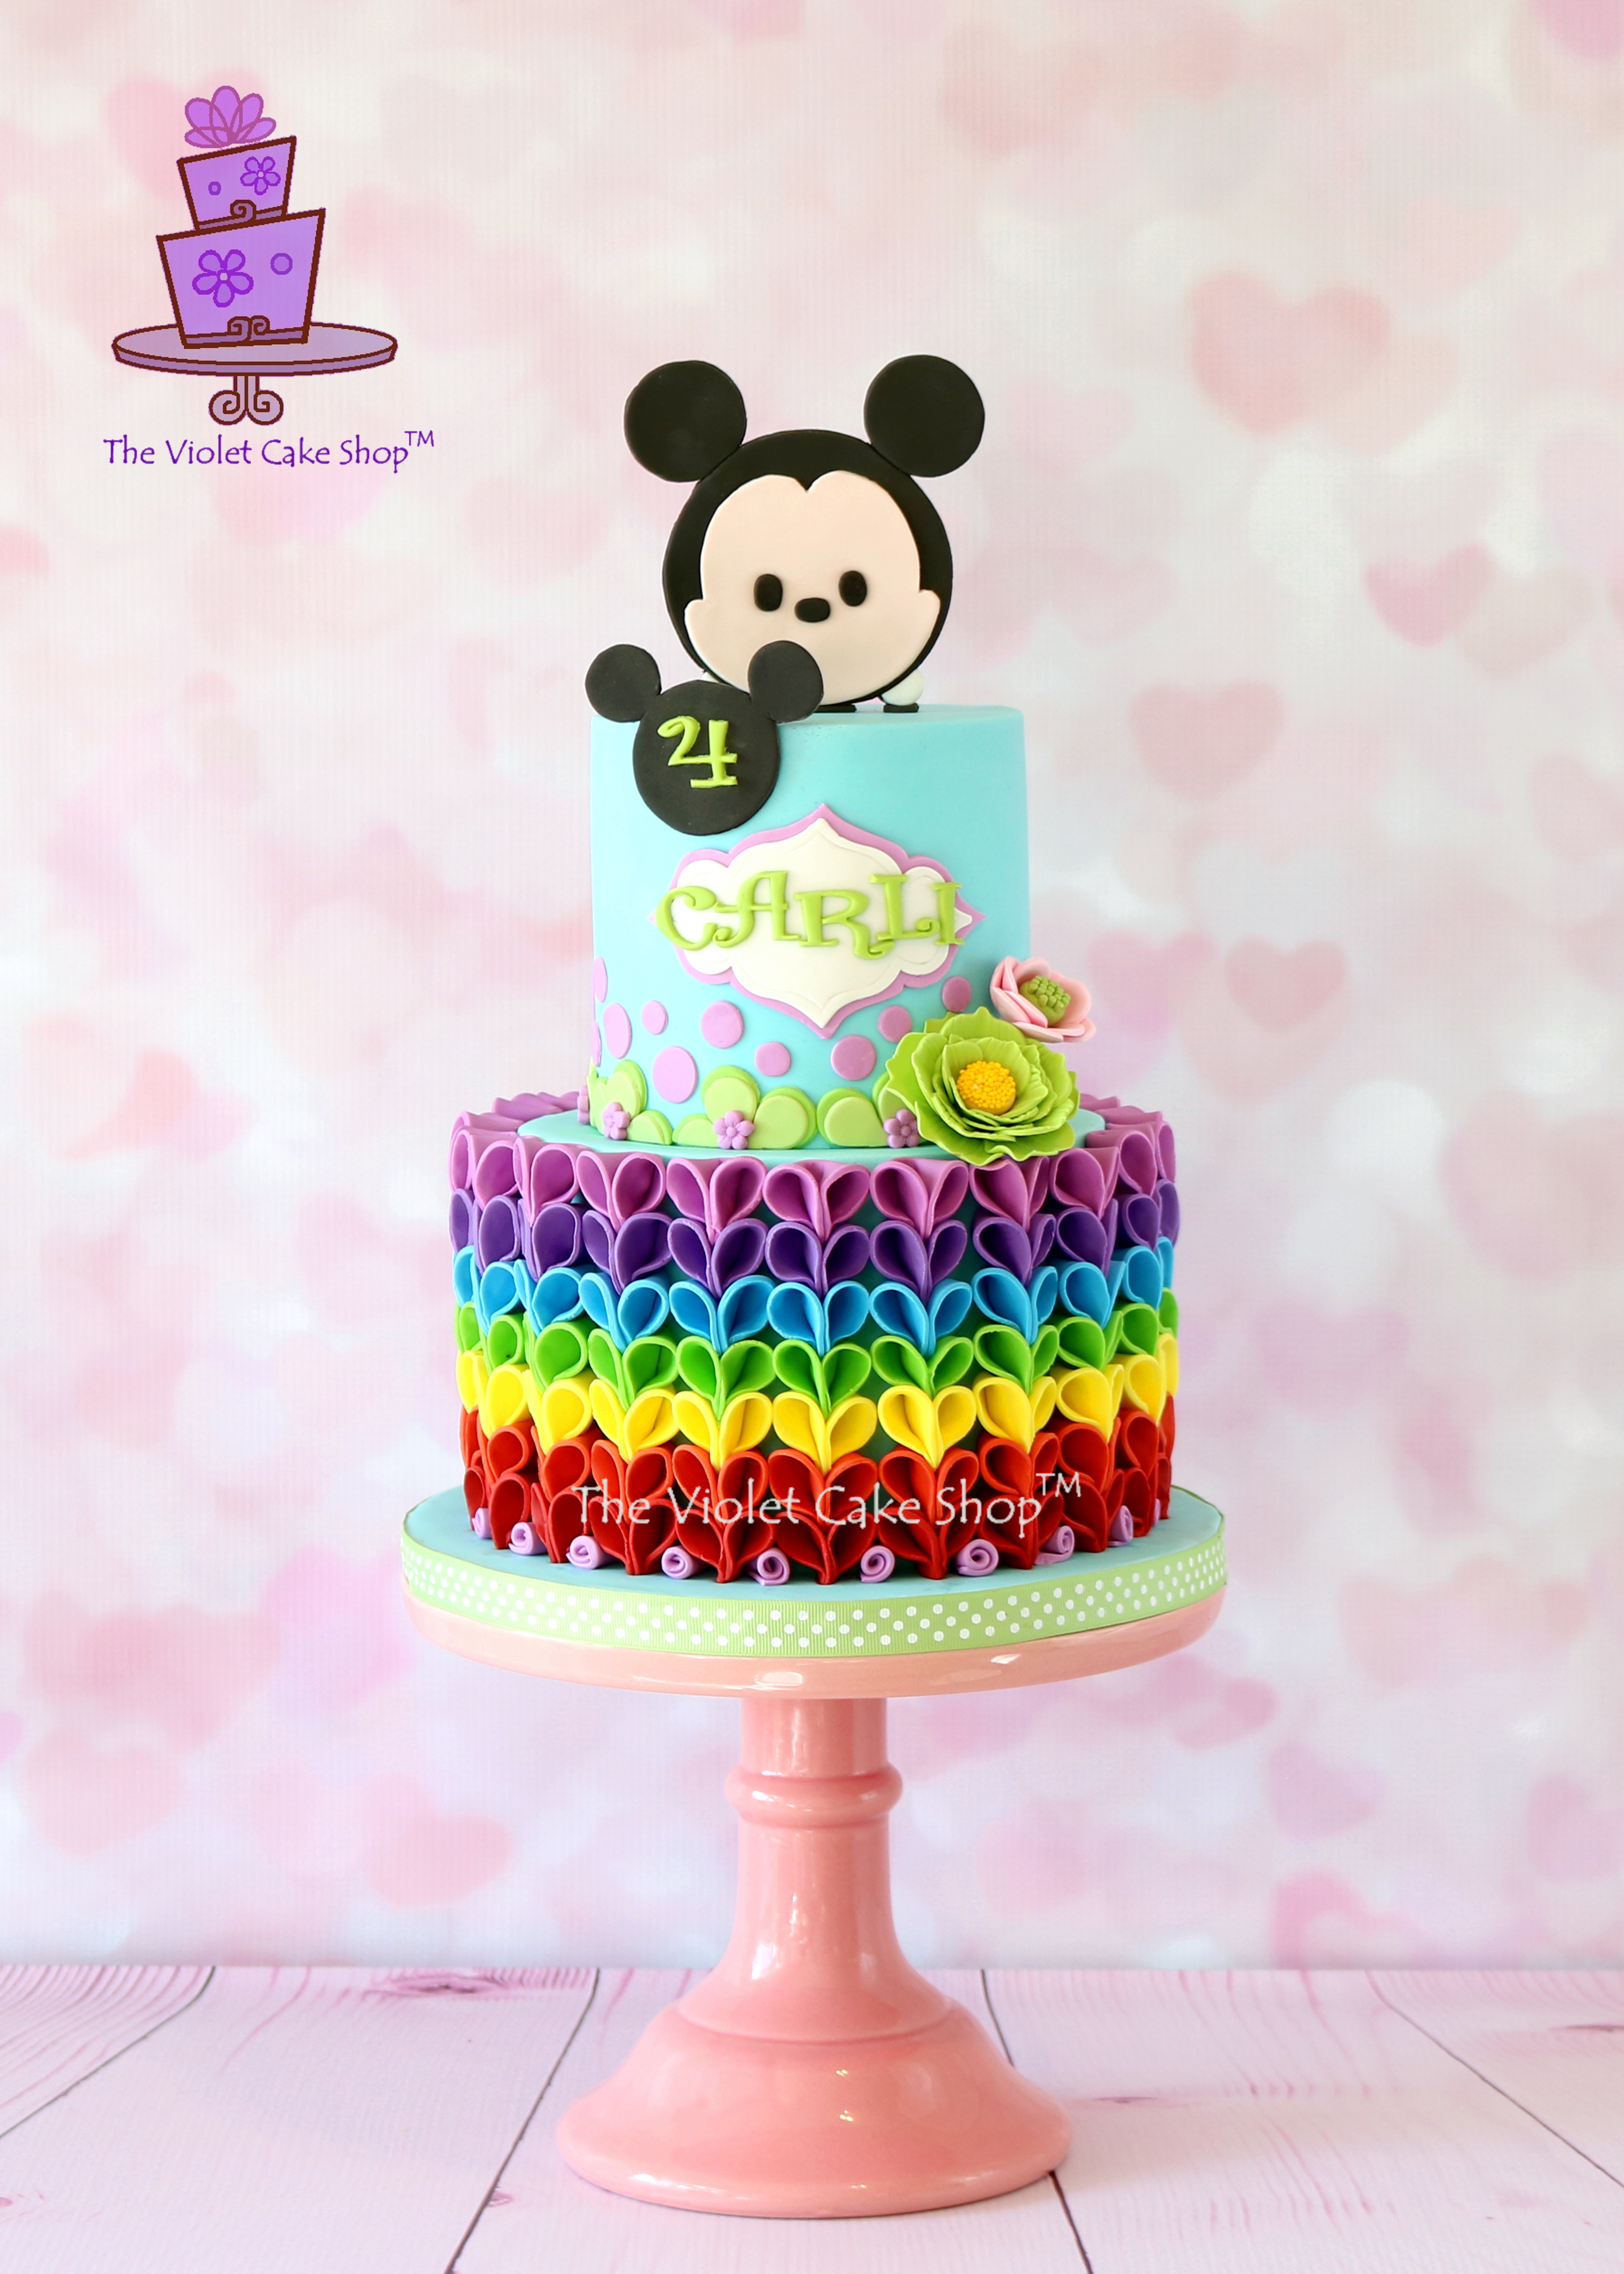
So I decided to just let her design her own cake this year by telling me what she wanted it to have. Well she had very clear and specific ideas and was very thorough too!! Score! All I had to do was come up with something that would tie in a blue coloured cake, a rainbow or rainbow colours, a number 4, green flowers and (dun dun dun…) Mickey on top…sigh, lol. Ok, well I had to concede on that last request as it WAS her cake and I WAS letting her design it this year, after all. It was not going to be easy but I was determined to come up with a design that would tie it all in while still being cohesive and girly!
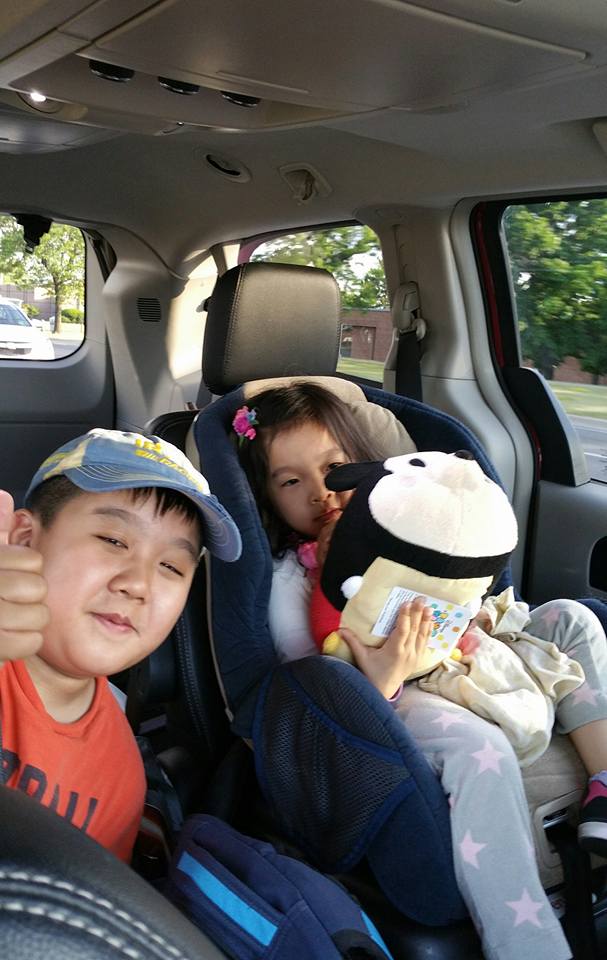
And Fate intervened on her cake too, kind of sort of… We were out shopping a few weeks before her birthday and her brother (Mr. 11) saw a Tsum Tsum Mickey plush toy at the Disney Store and knowing how she loved the Tsum Tsum short videos on TV, suggested that he get it for her as her early birthday present (awww so sweet, I KNOW!) Well, she has not really put down her Tsum Tsum Mickey since and EUREKA! I had a replacement for the 3D Mickey I was going to have top her cake (YAY!!)
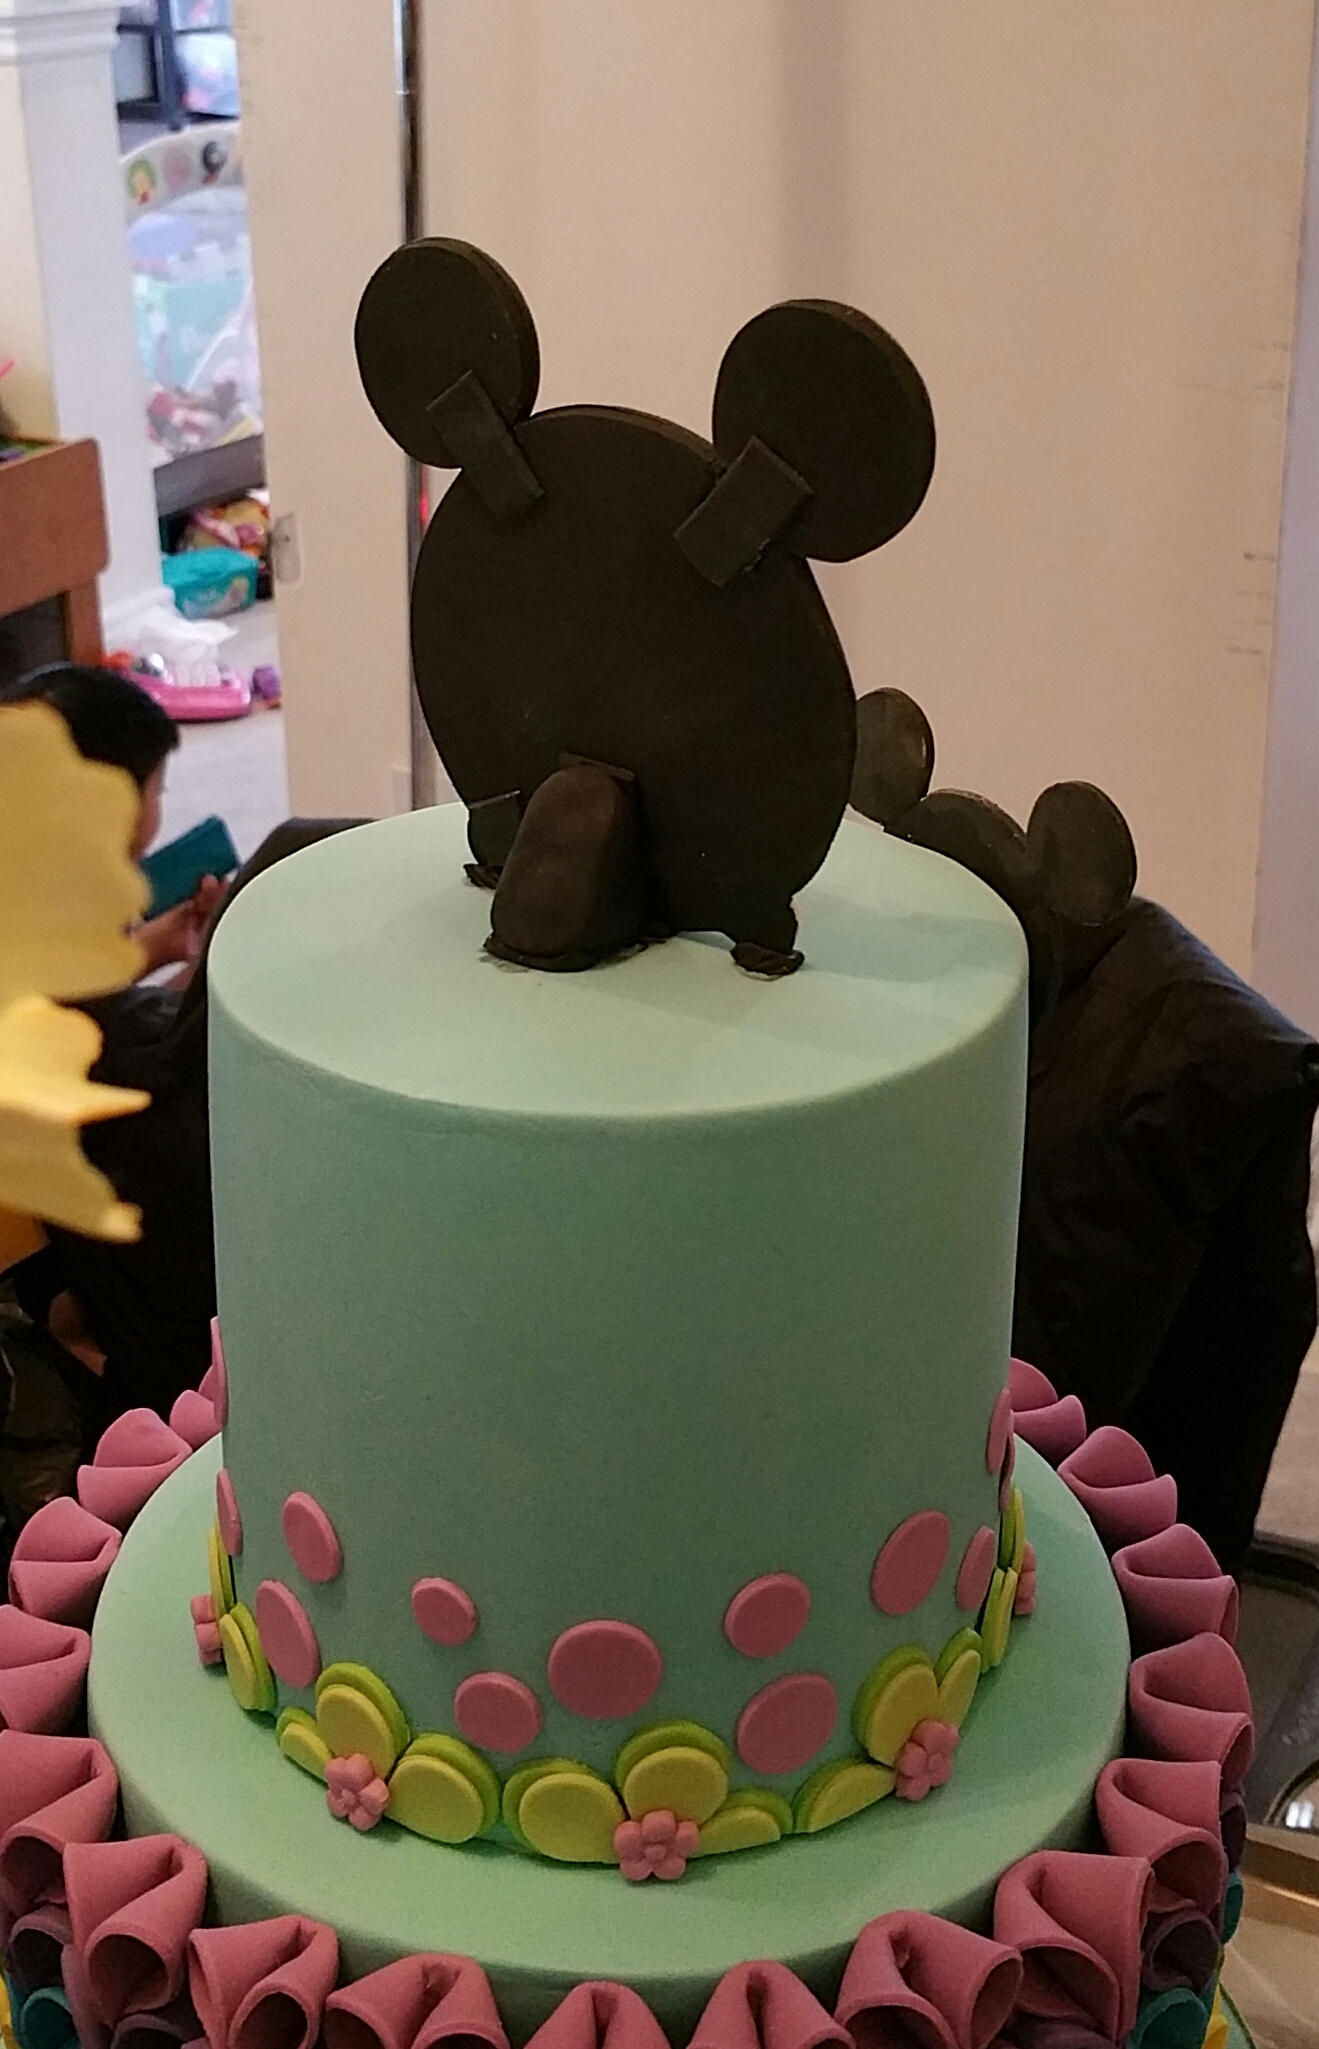
There was a tiny mishap with the topper though, not because of the last minute change but more because of my bad habit of procrastination…
The topper did not have ample time to dry completely, so it was still a tad soft when I assembled it and stood him up. It would have been fine had I just left him to air dry the rest of the time before the party, but I thought I’d be smart and do one extra step to avoid having the purples on the cake fade, by covering it with a black bag even though it wasn’t necessary given my trick for adding extra deep pink (see this previous blog post on preventing your purples from fading). Well, I did NOT account for the build up of humidity inside the bag which in turn, softened the topper further so that the ears drooped forward and eventually cracked and fell off. Luckily it was a personal cake so a lousy patch job was all that was needed and voila! the topper stood again. Lesson learned for next time though.
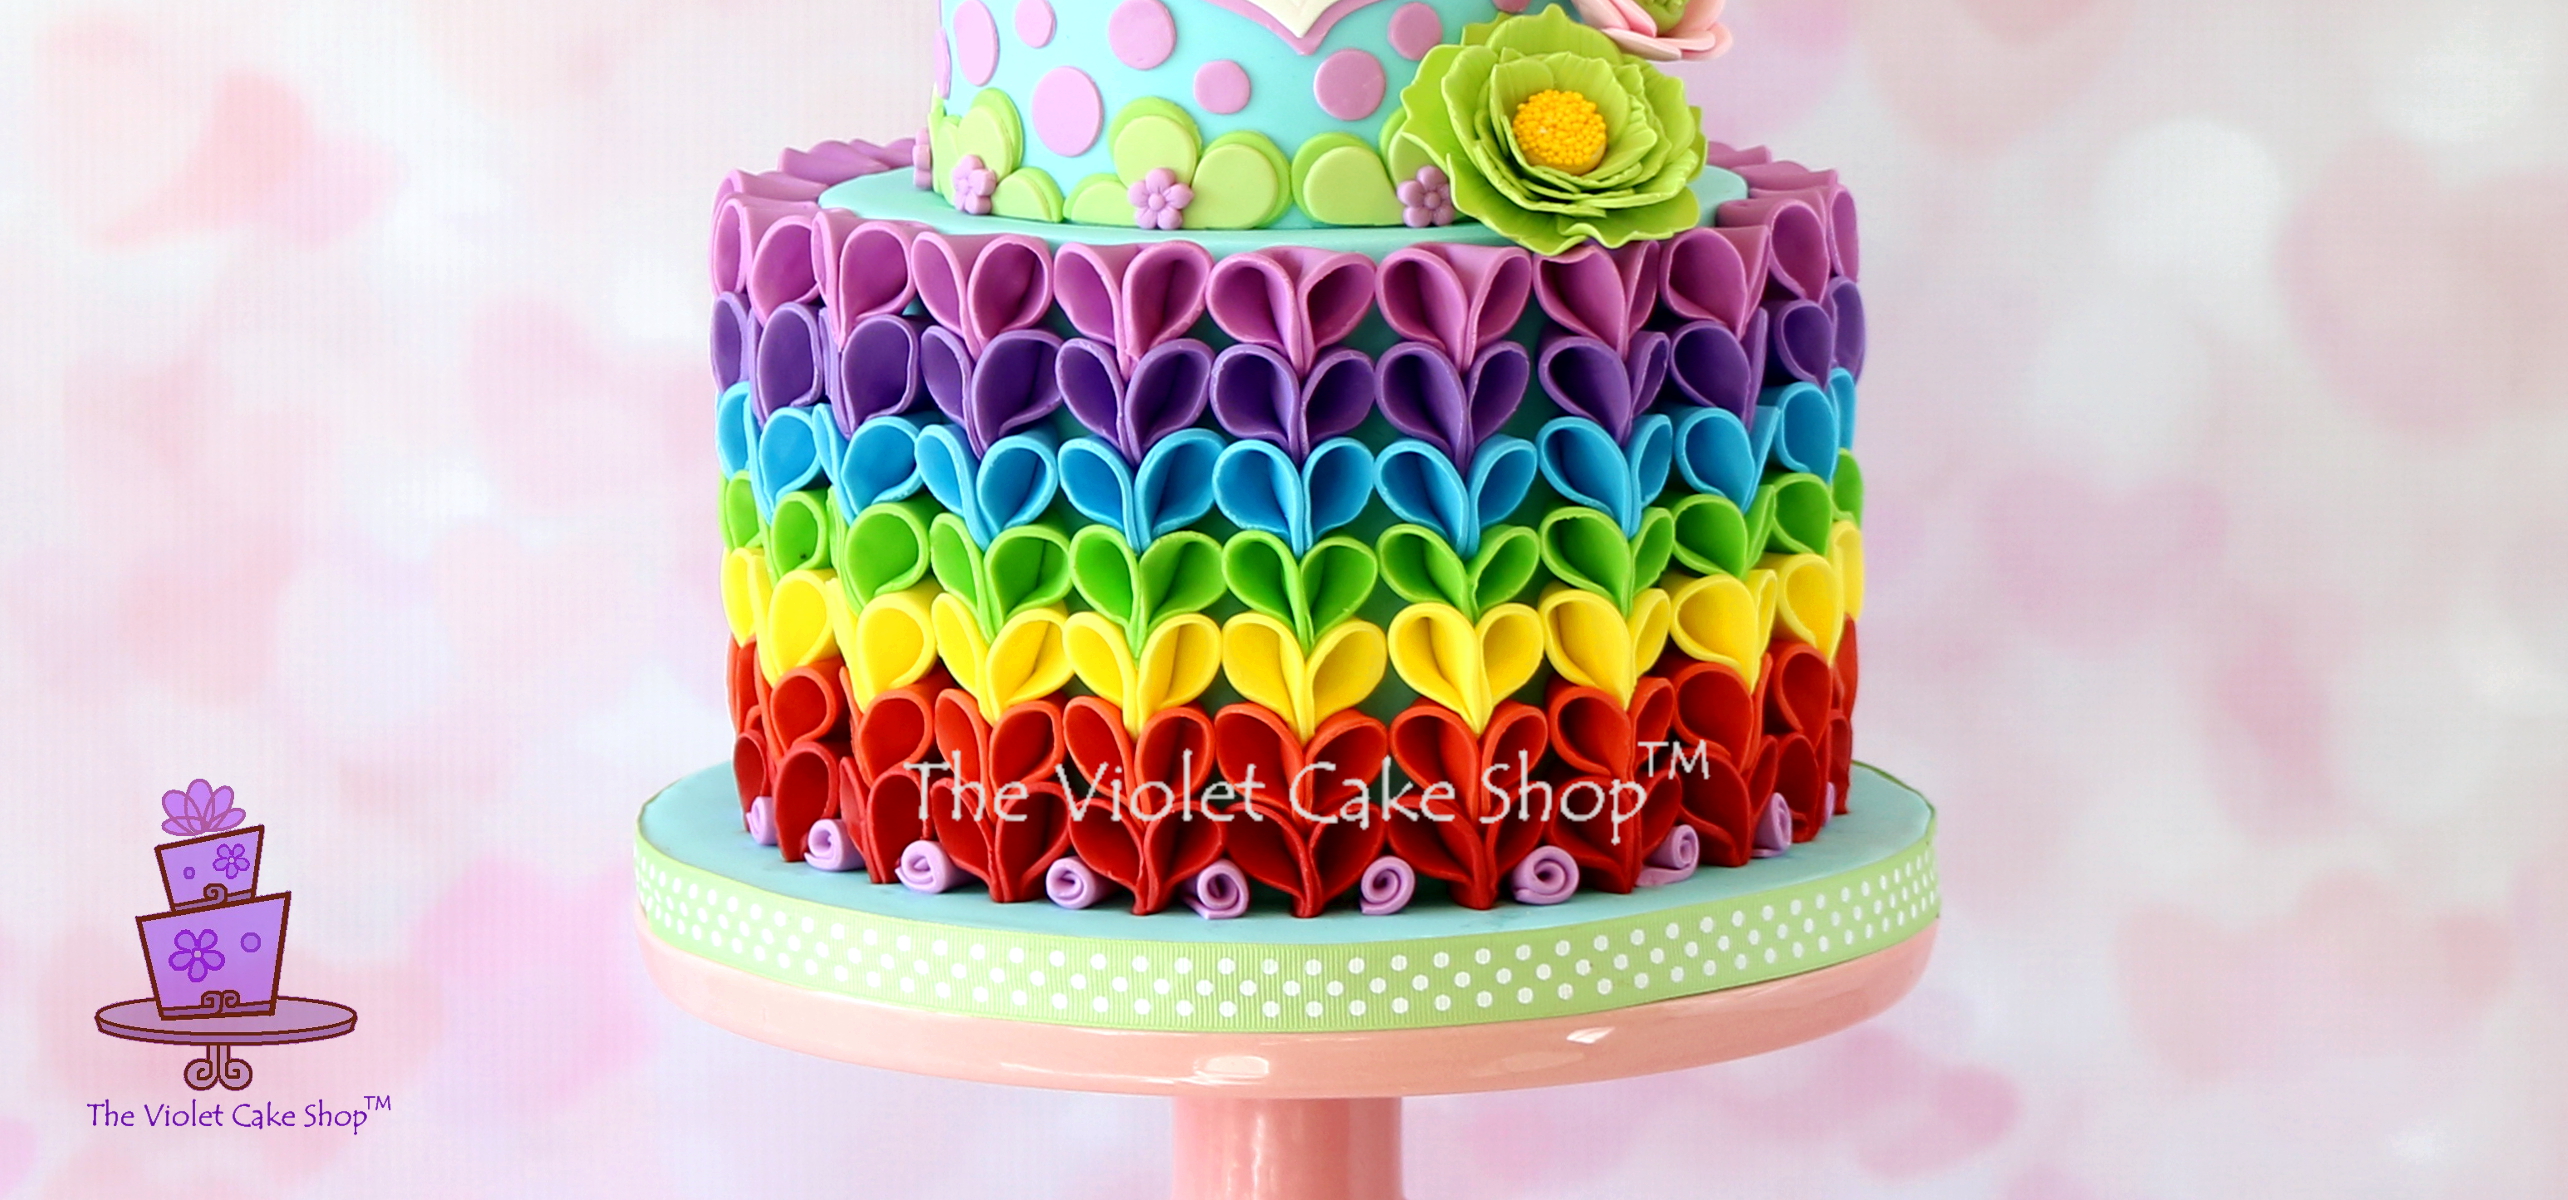
To incorporate the rainbow aspect of her request, I decided to use my V-Petal ruffles (see previous post for the mini-tutorial). After I came up with those, I immediately wanted to try it with rainbow colours so it was a win-win to use them on my daughter’s cake…well, she didn’t say it HAD to be an actual rainbow lol! The colours are tedious to mix but it was much easier than mixing from white with gel colours because I used the Satin Ice pre-coloured fondant. I wanted slightly less intense colours so most of them I had to remix with either white to tone down the intensity, or with other colours to get the tone I wanted.
Here is another angle of her cake. It just shows the topper a bit better because the number 4 plaque on the first pic kind of makes the Tsum Tsum Mickey topper look like his mouth is wide open in surprise haha!
And here is my baby with her Tsum Tsum and her cake…


You must be logged in to post a comment.